

Don’t you know? You scroll through your ff-related discords, websites or social media and there you stumble upon it: Screenshots. Beautifully arranged, making you stare in awe and leaving you wondering how you could do beautiful pictures like that as well. Screenshots in ff are easy to make. They are however a bit more tricky to make well.
In this guide I want to explain the ingame screenshot options and features of gpose, give you some tips on how or where to start for a screenshot and just push you a little bit in the right direction. I will NOT go into detail about the science behind photography, so no professional terms, no big explanations about composition or anything of the like. I started doing screenshots without knowing any of it and I believe you can do good screenshots without having to know about it, and this is what this guide is for.
Without further ado, let’s go!
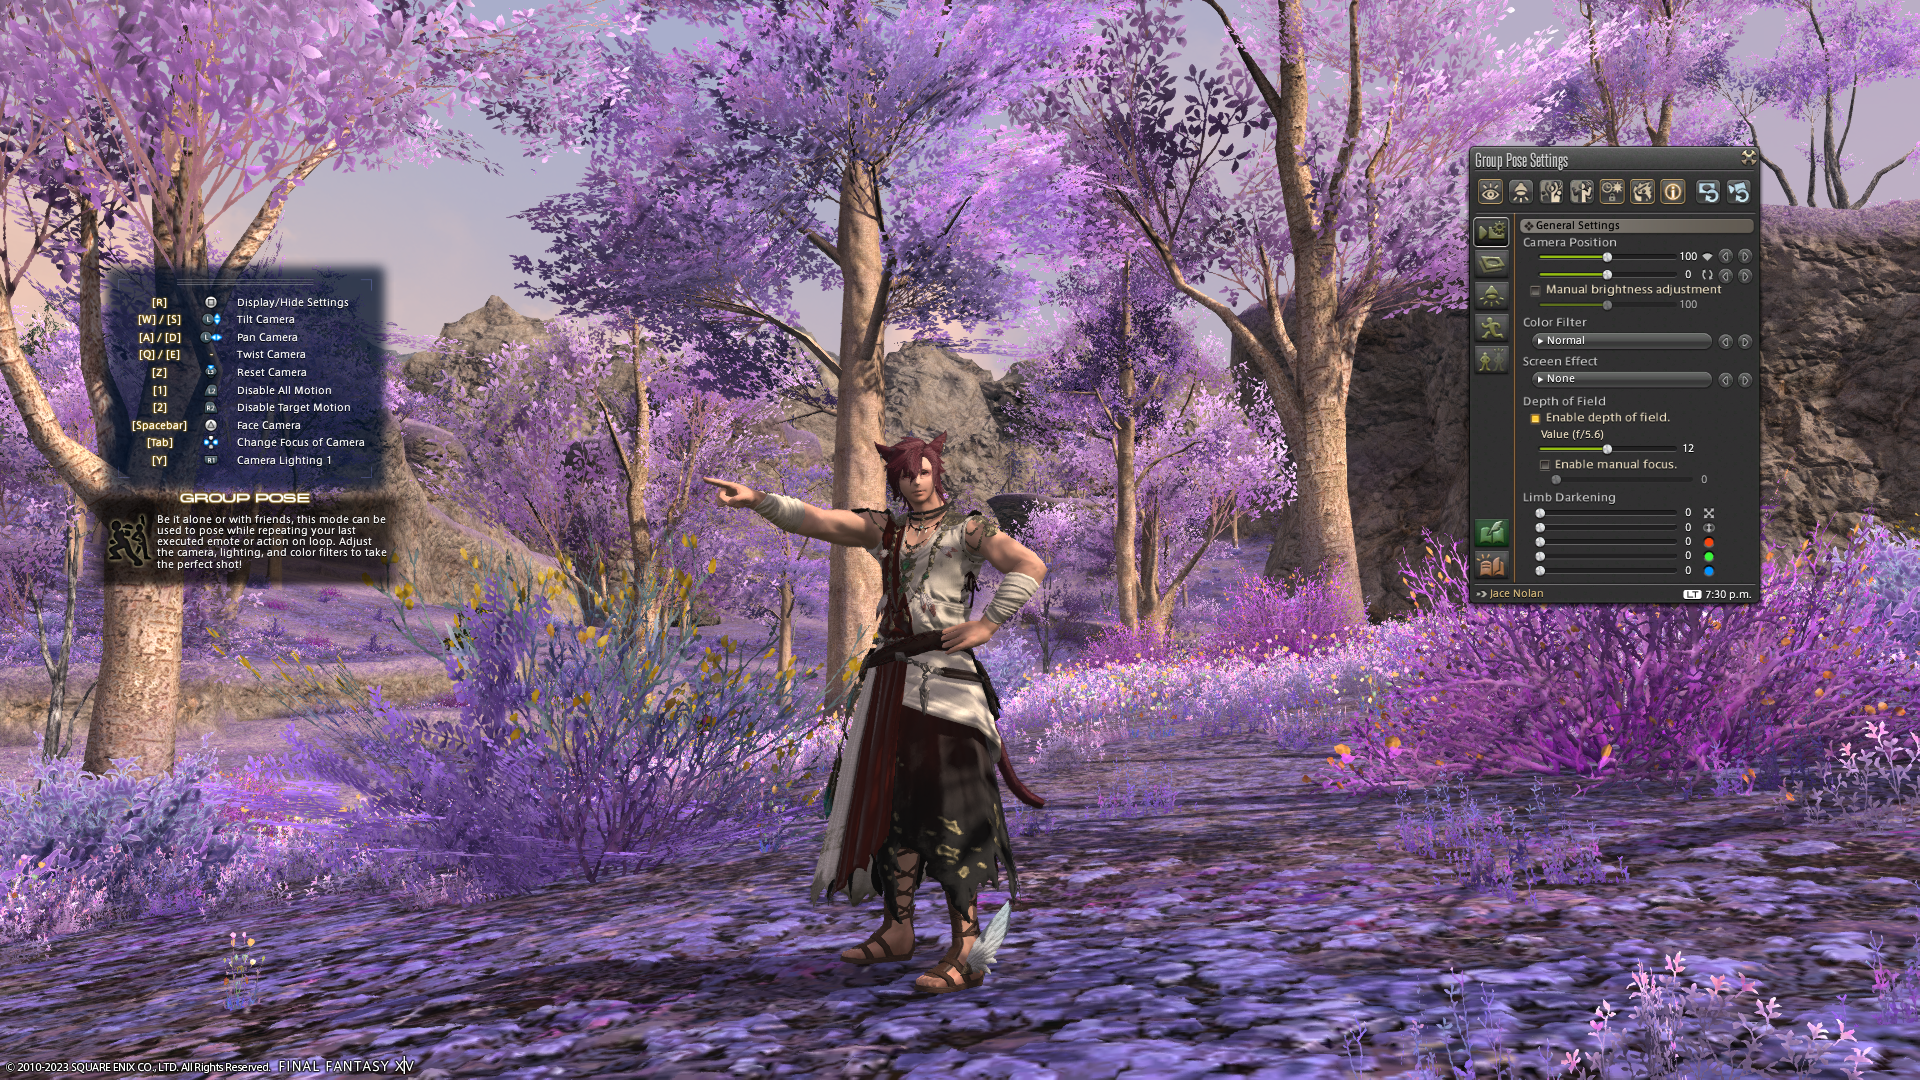
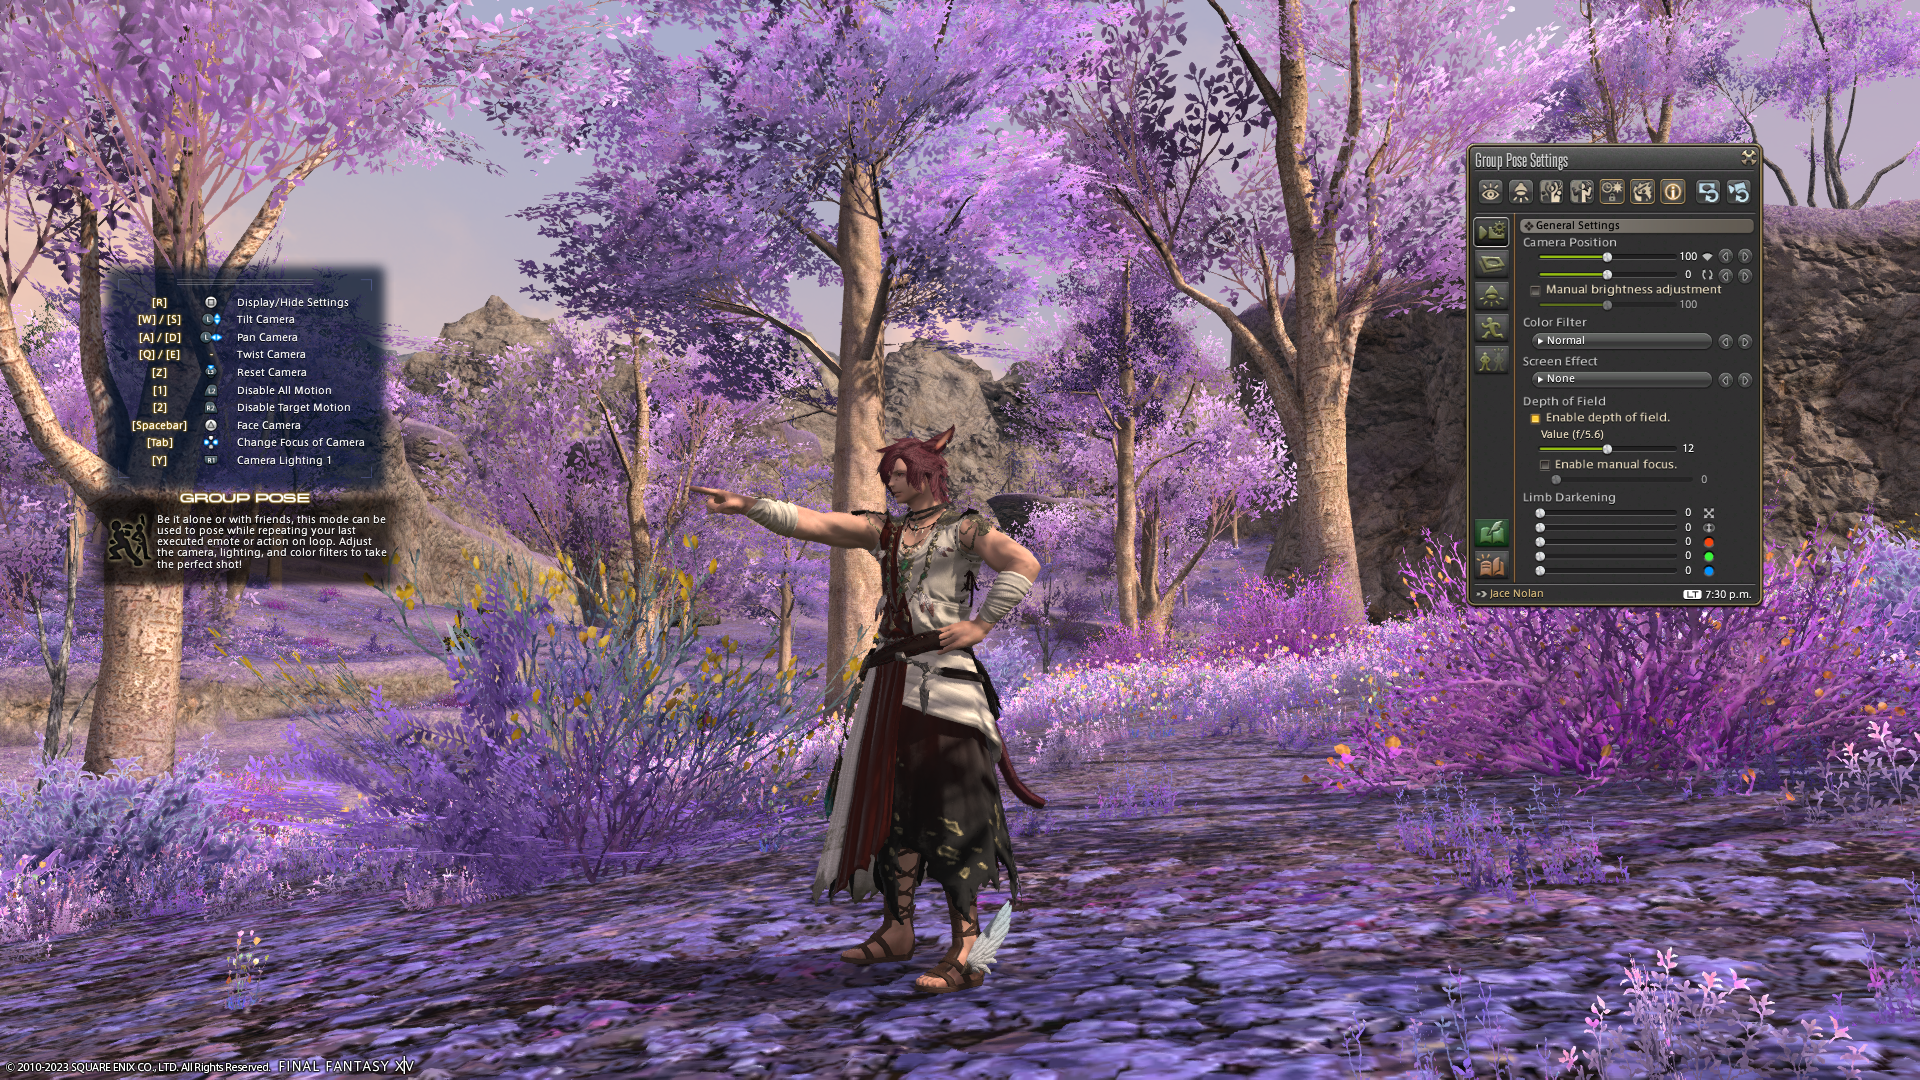
While screenshots can happen naturally by for example, you just seeing your character in a great angle in a beautiful sunset and just quickly pressing /gpose and taking a picture, going about a picture with a plan requires, well, at least a bit of a concept. What kind of image do you want to go for? Do you want to focus something specific? Do you want to tell a story with the picture? Do you just want to showcase something like a piece of glamour or a new weapon? Having a rough idea what you want to focus on, will help you already in planning out your next steps. Take these pictures for examples:
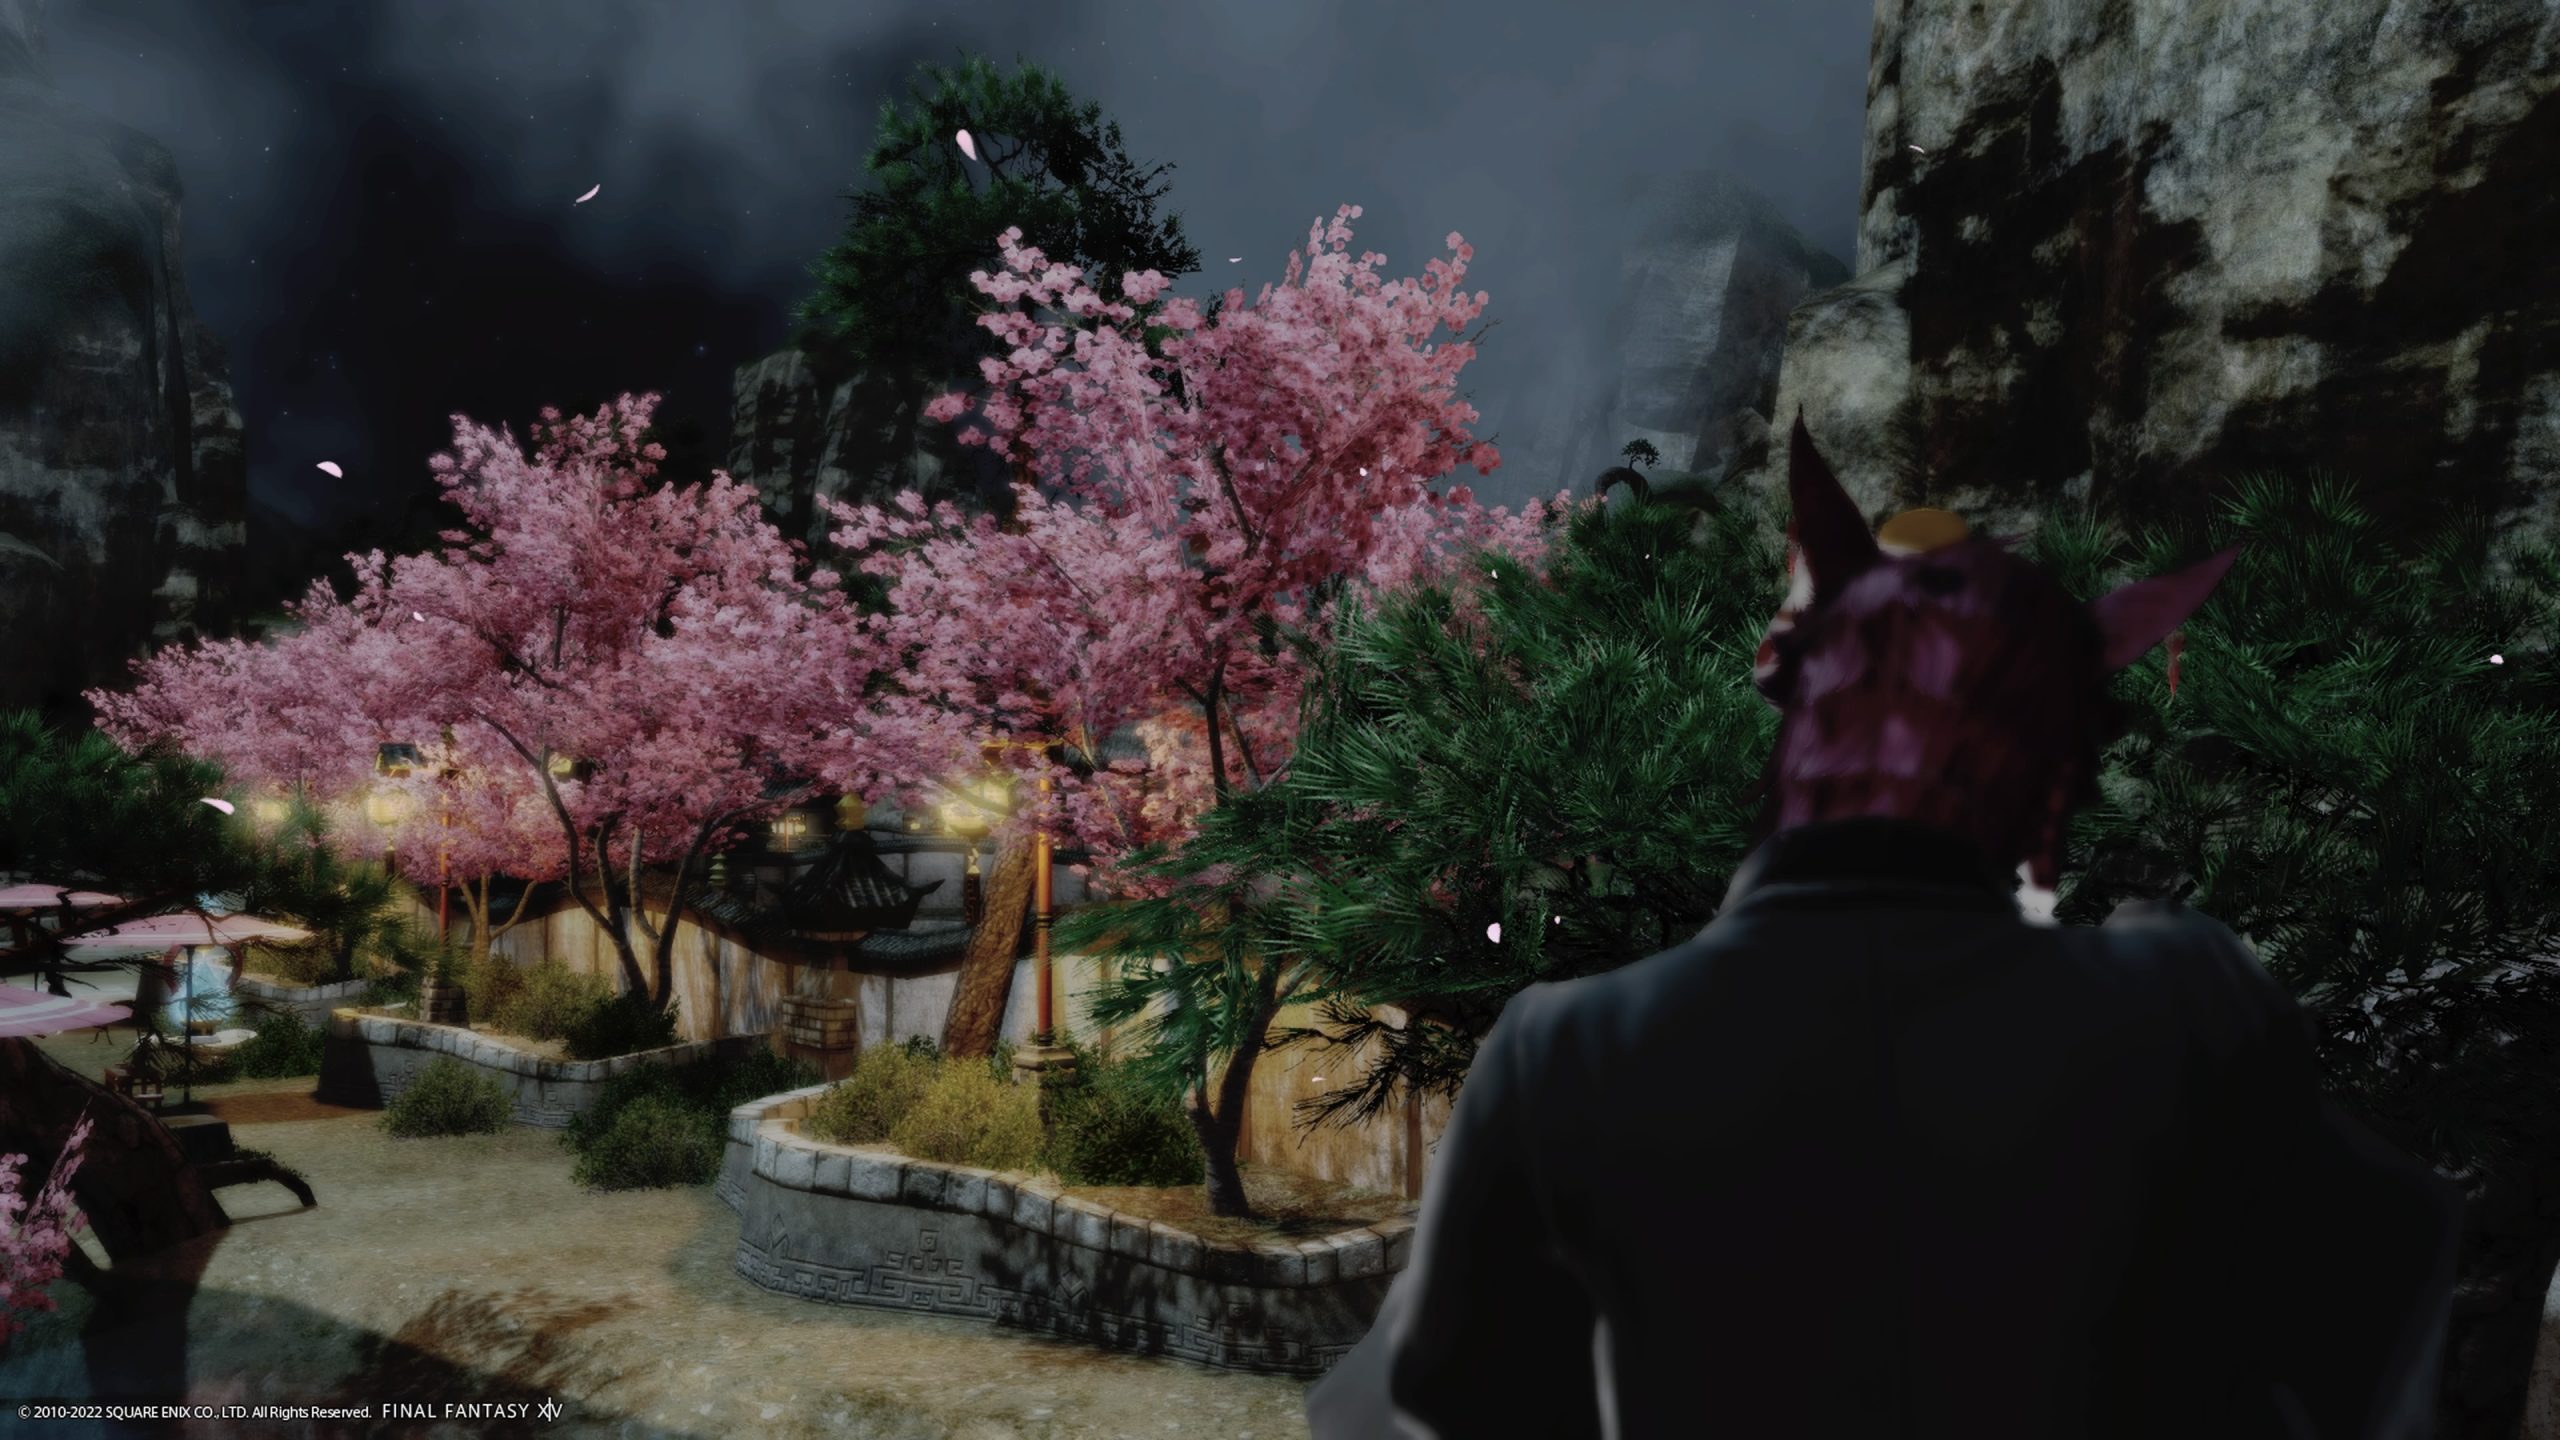
Focus of the area
In this picture, the area is the focus. I wanted to showcase the beauty of the Doman Enclave. To achieve this, I positioned my character to the side of the landmark I wanted to focus on. Bonus for my character for being out of focus as well.
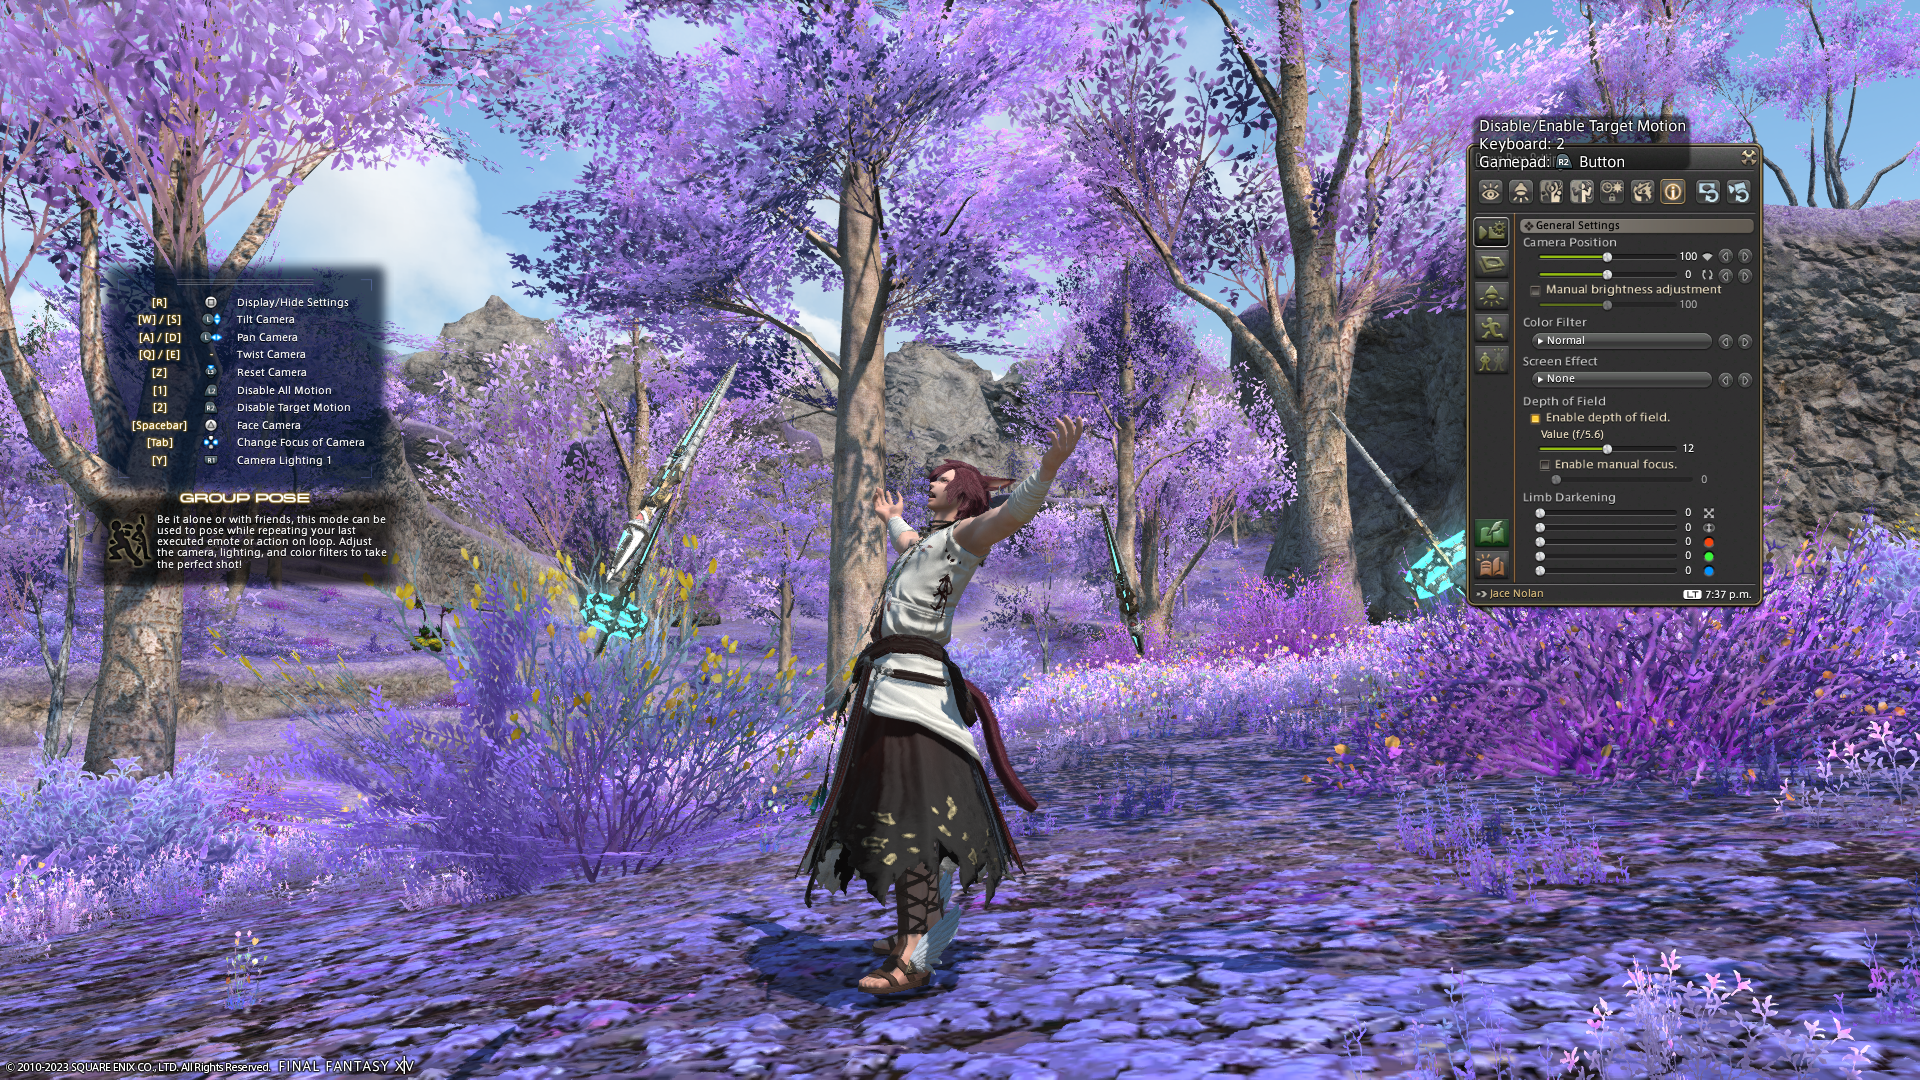
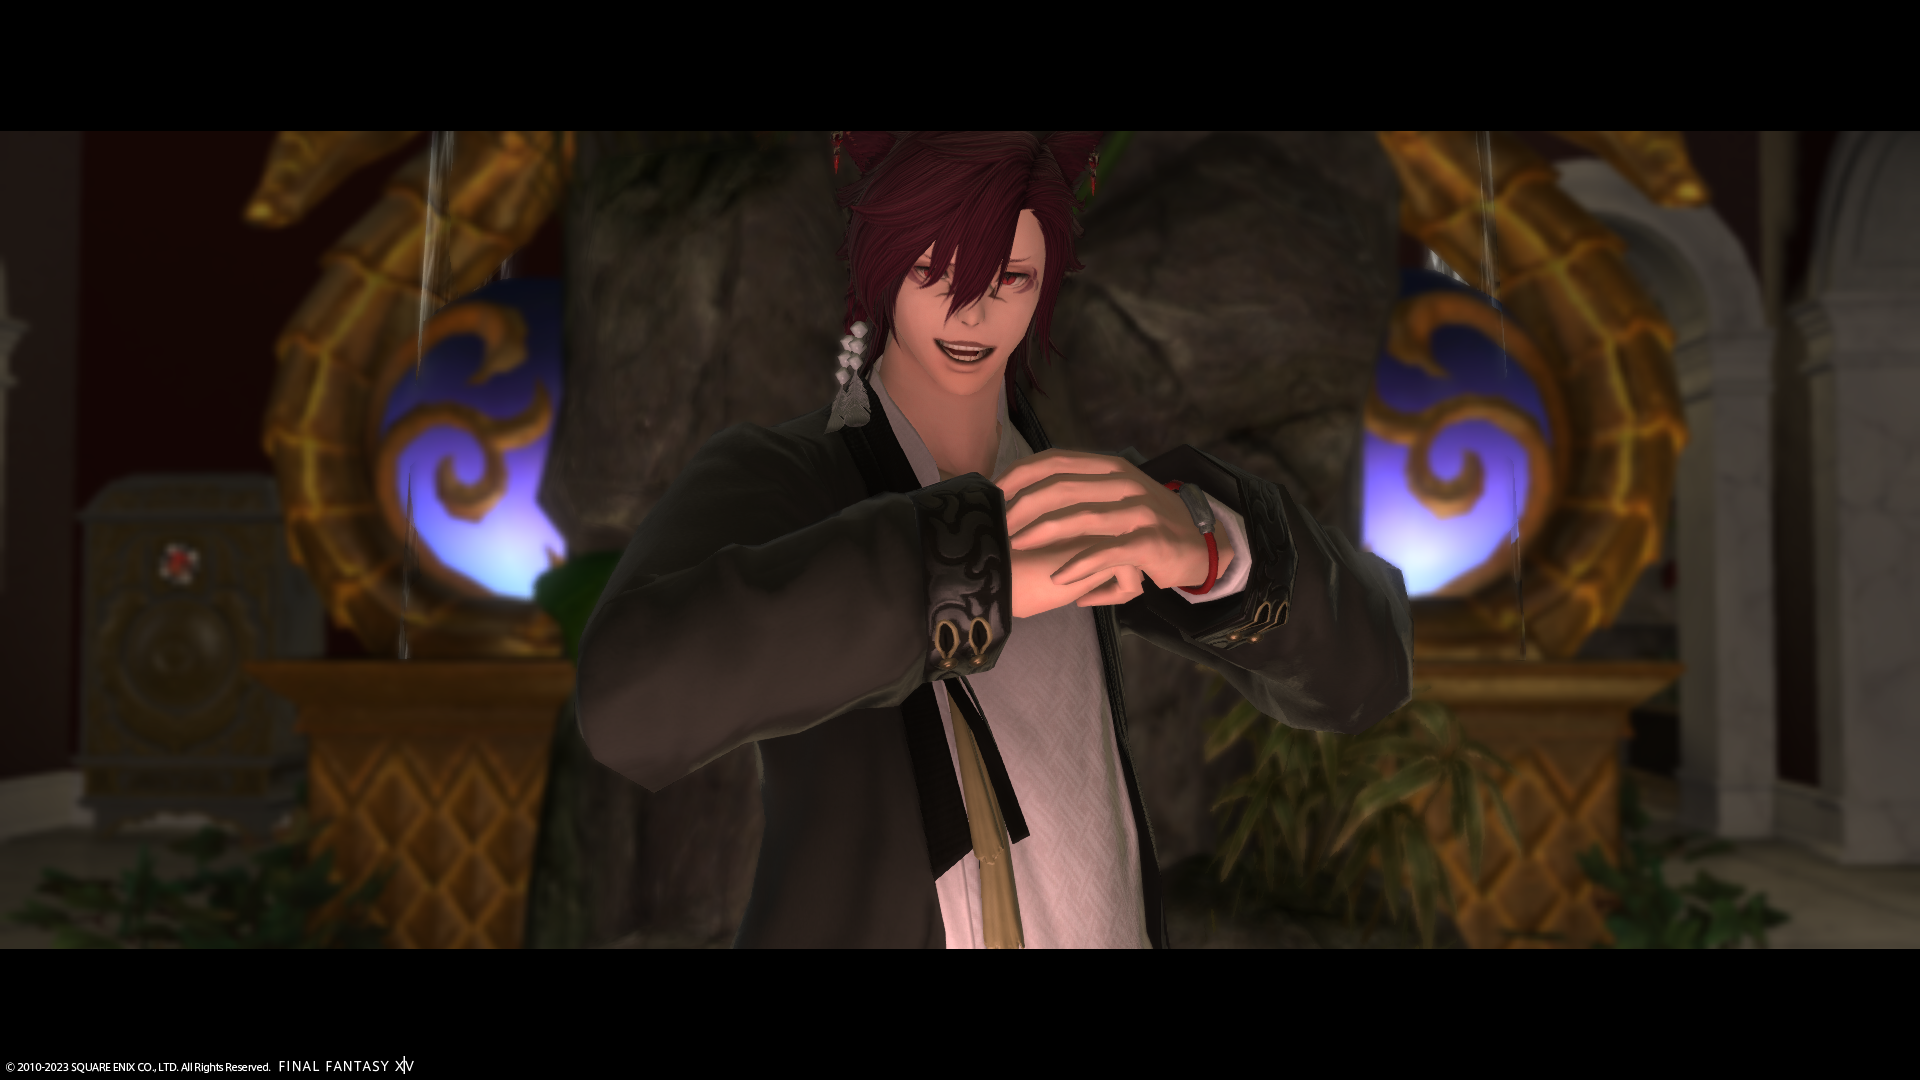
Focus on a class
When my Reaper reached level 90, I wanted to celebrate it. For this, I tried to make pictures with Reaper skills, showcasing the class itself and less things that can be commonly done with any class.

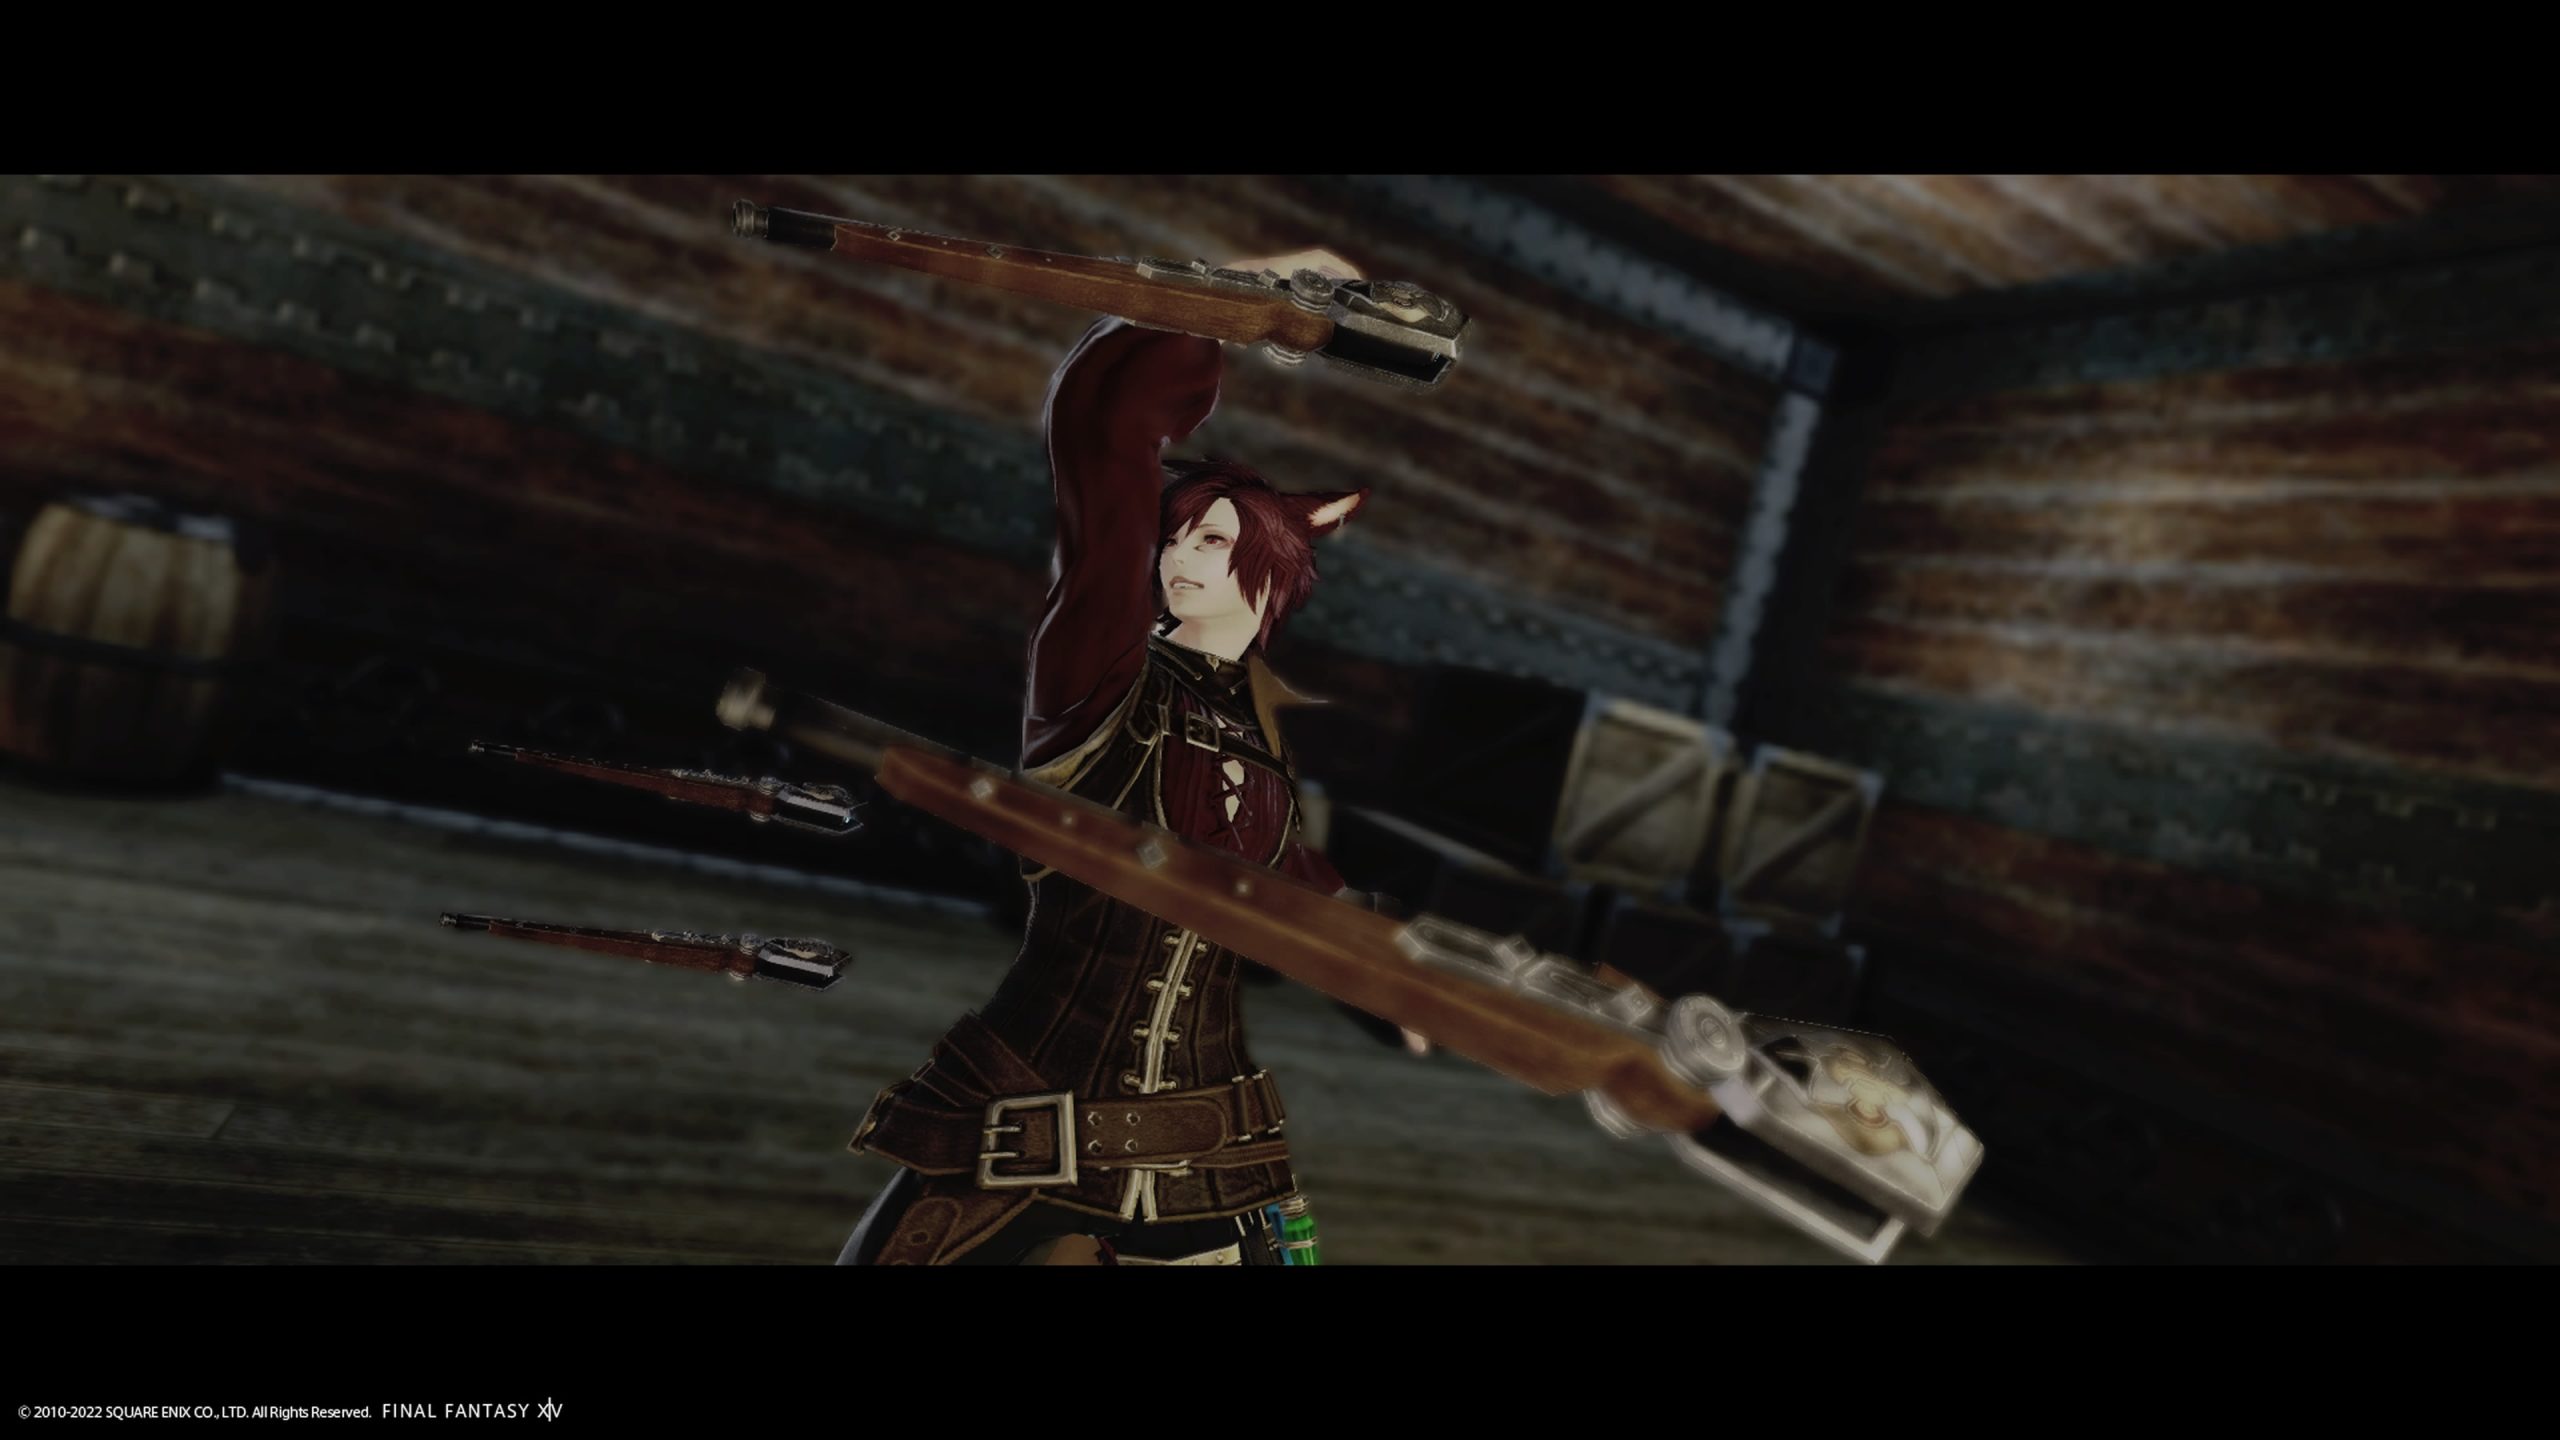
Focus on glamour
Similar to the focus of the class, to focus on a piece of glam, I try to make said glam the eyecatcher. In this case, the glam I wanted to showcase is the weapon, putting it right in the middle of the picture, forcing the viewer to notice it.
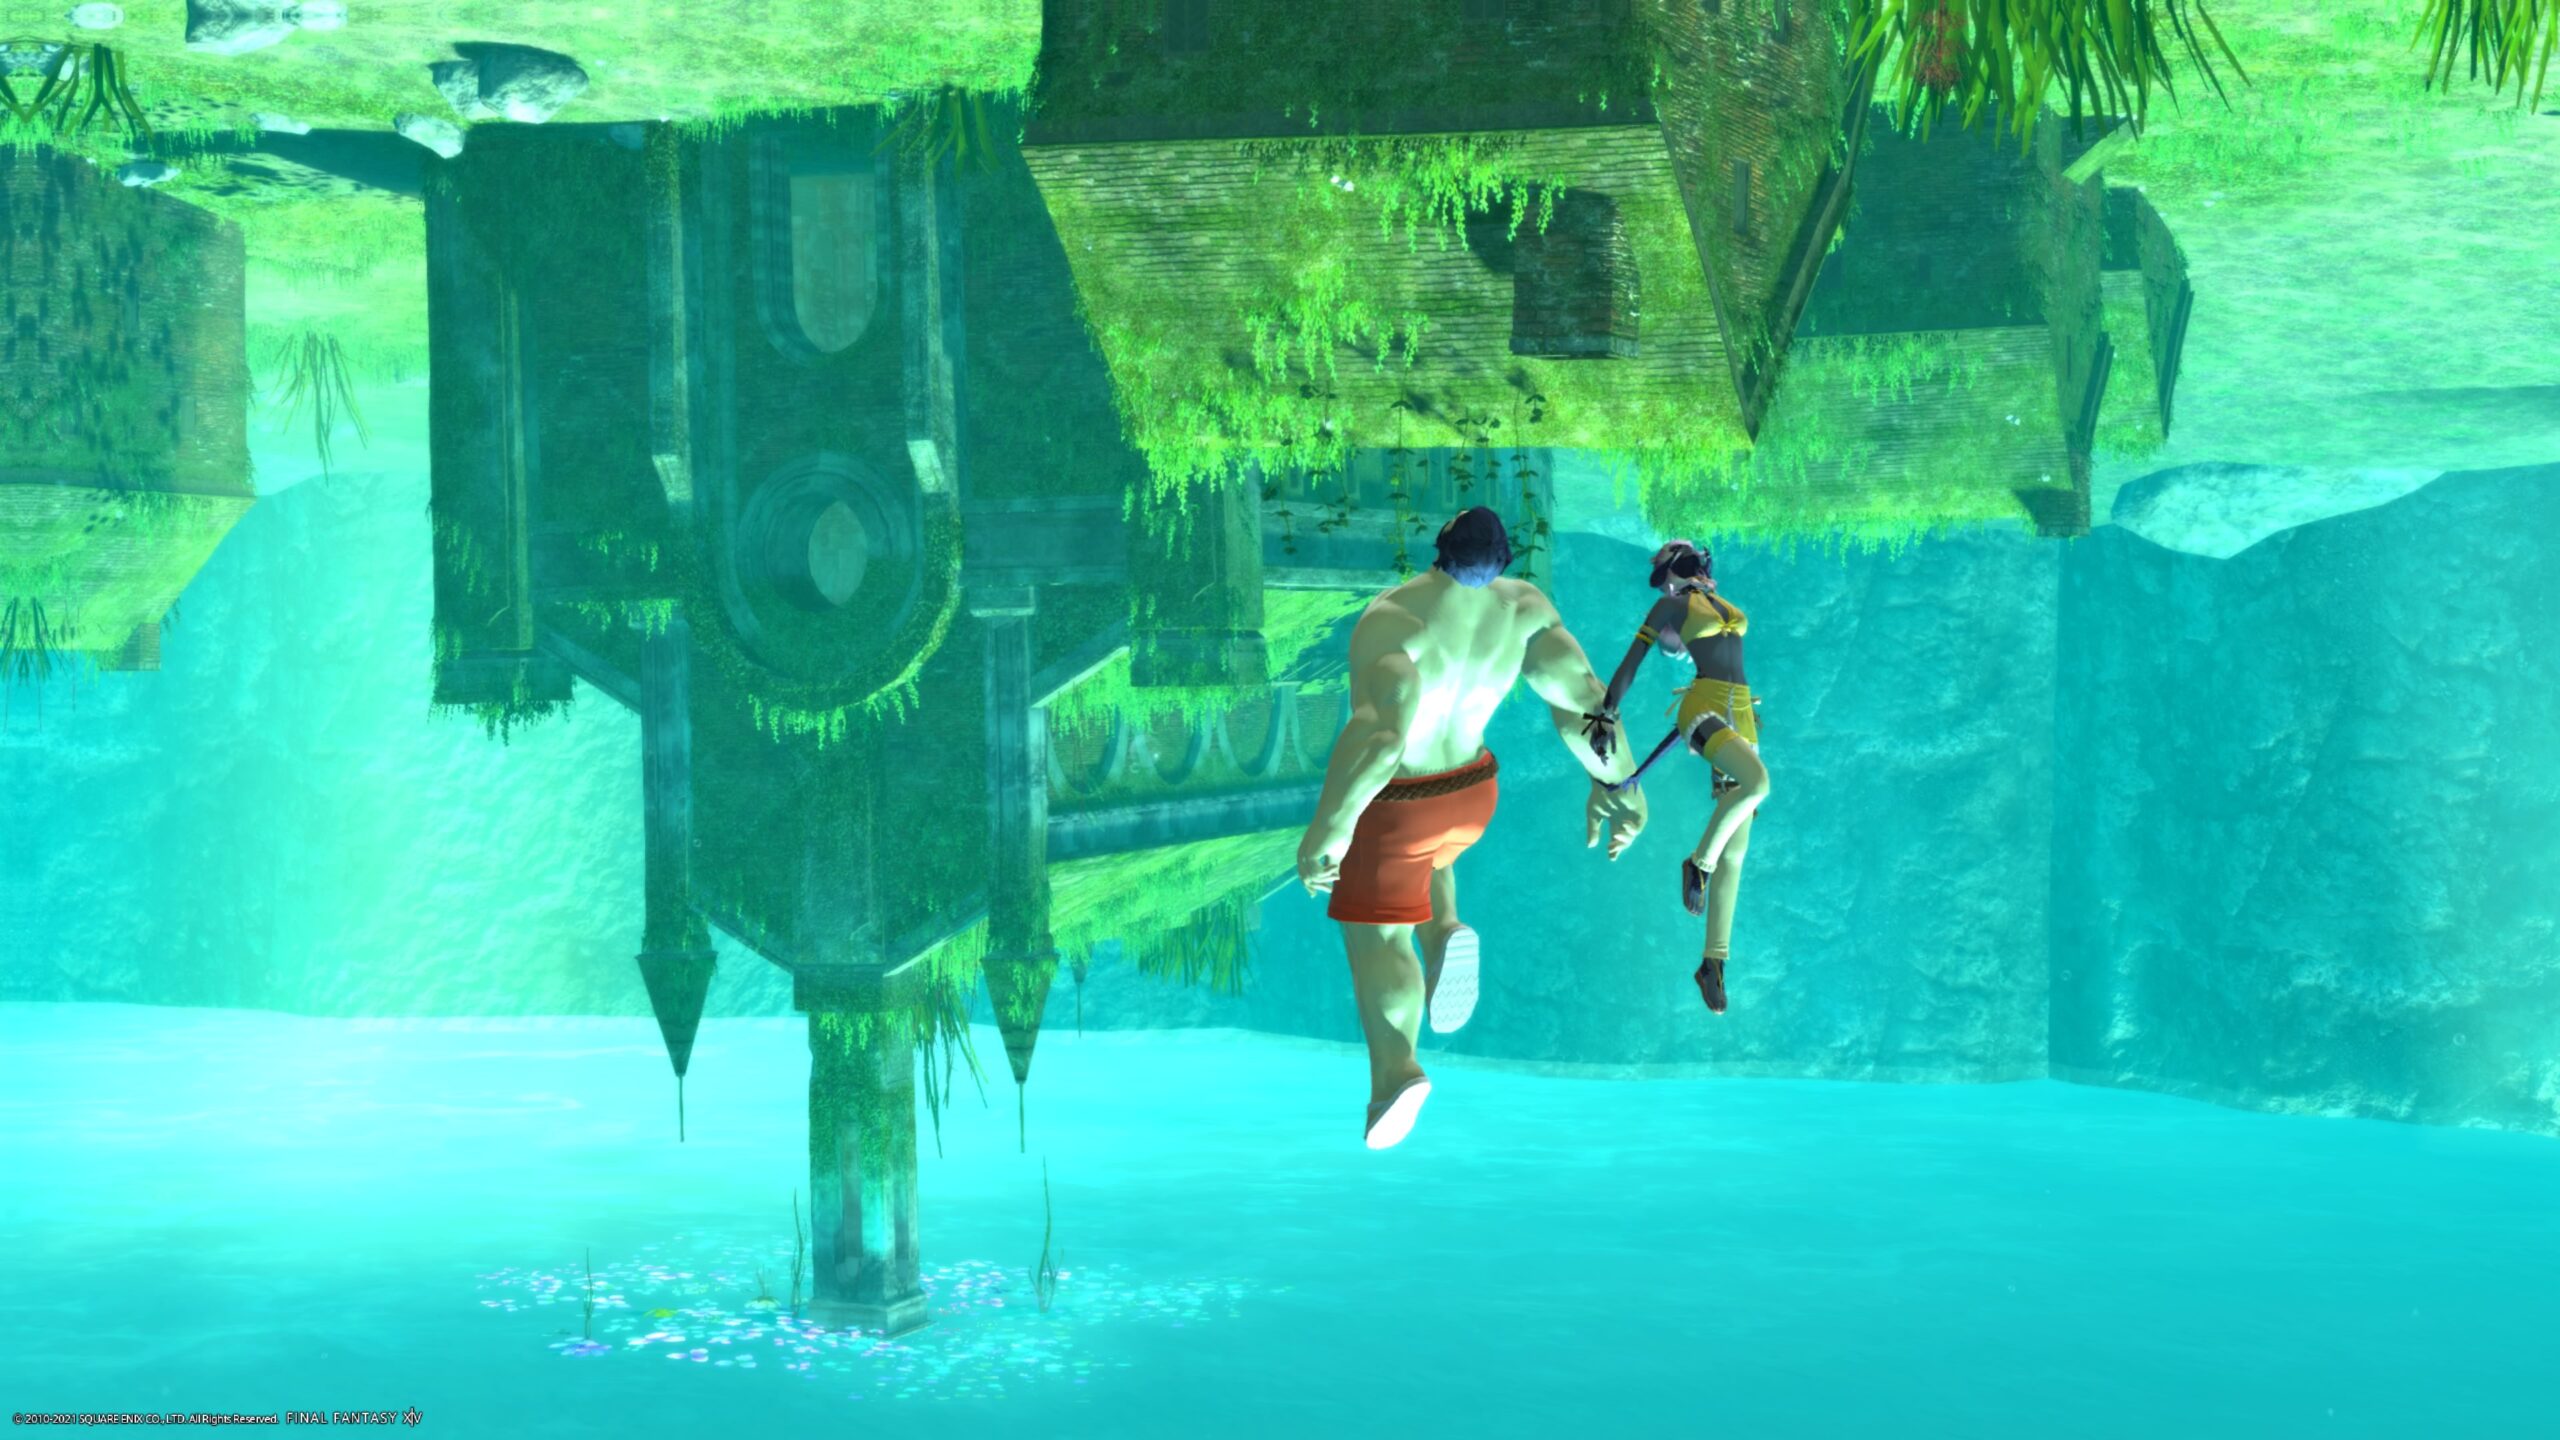
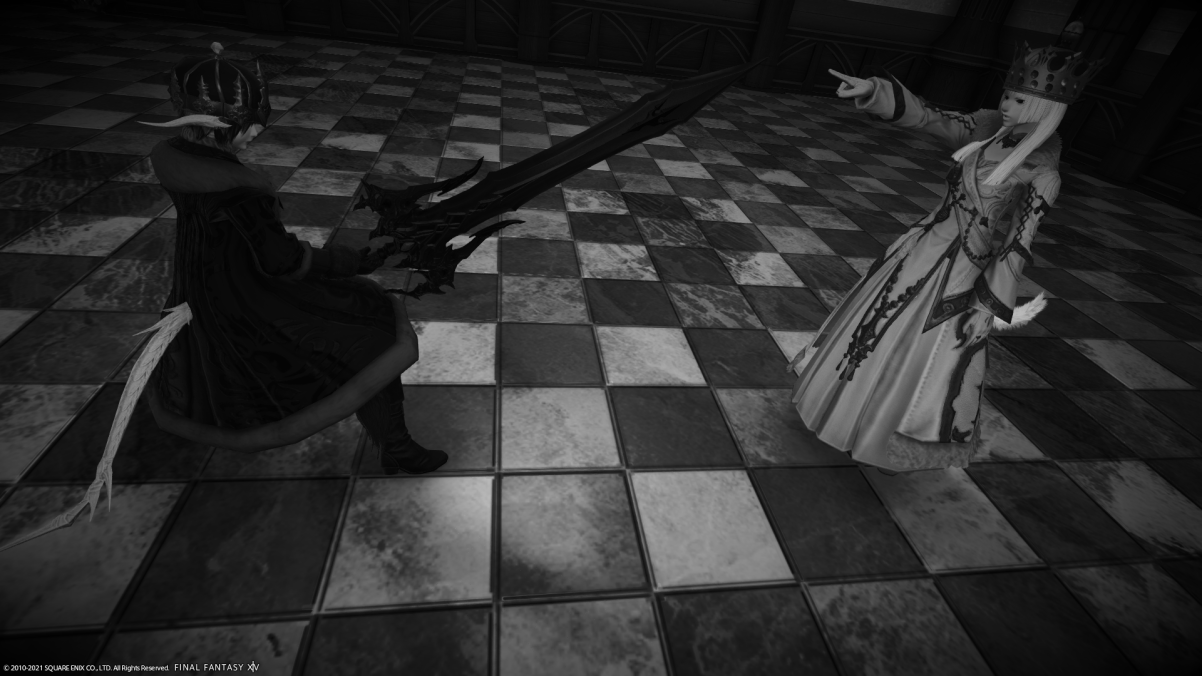
Focus on a story
A picture says a thousand words. It can be hard to achieve though. Most often than not, rather than a story, a picture should instead give off a feeling. That feeling usually helps to showcase the thoughts the photographer put into it. In this example, I tried to go for the melancholy and awe you get, if you walk through an old castle, taking in it’s age or magnificence. Did I succeed for you?

To make a screenshot, you need to enter gpose. To do that you either press the action button (found under Actions & Traits > Extras > “Group Pose”) or you type /gpose into the chat window.
Before you do though, let me give you some tips:
Having said all that, let’s look at all the possible settings in /gpose, shall we?
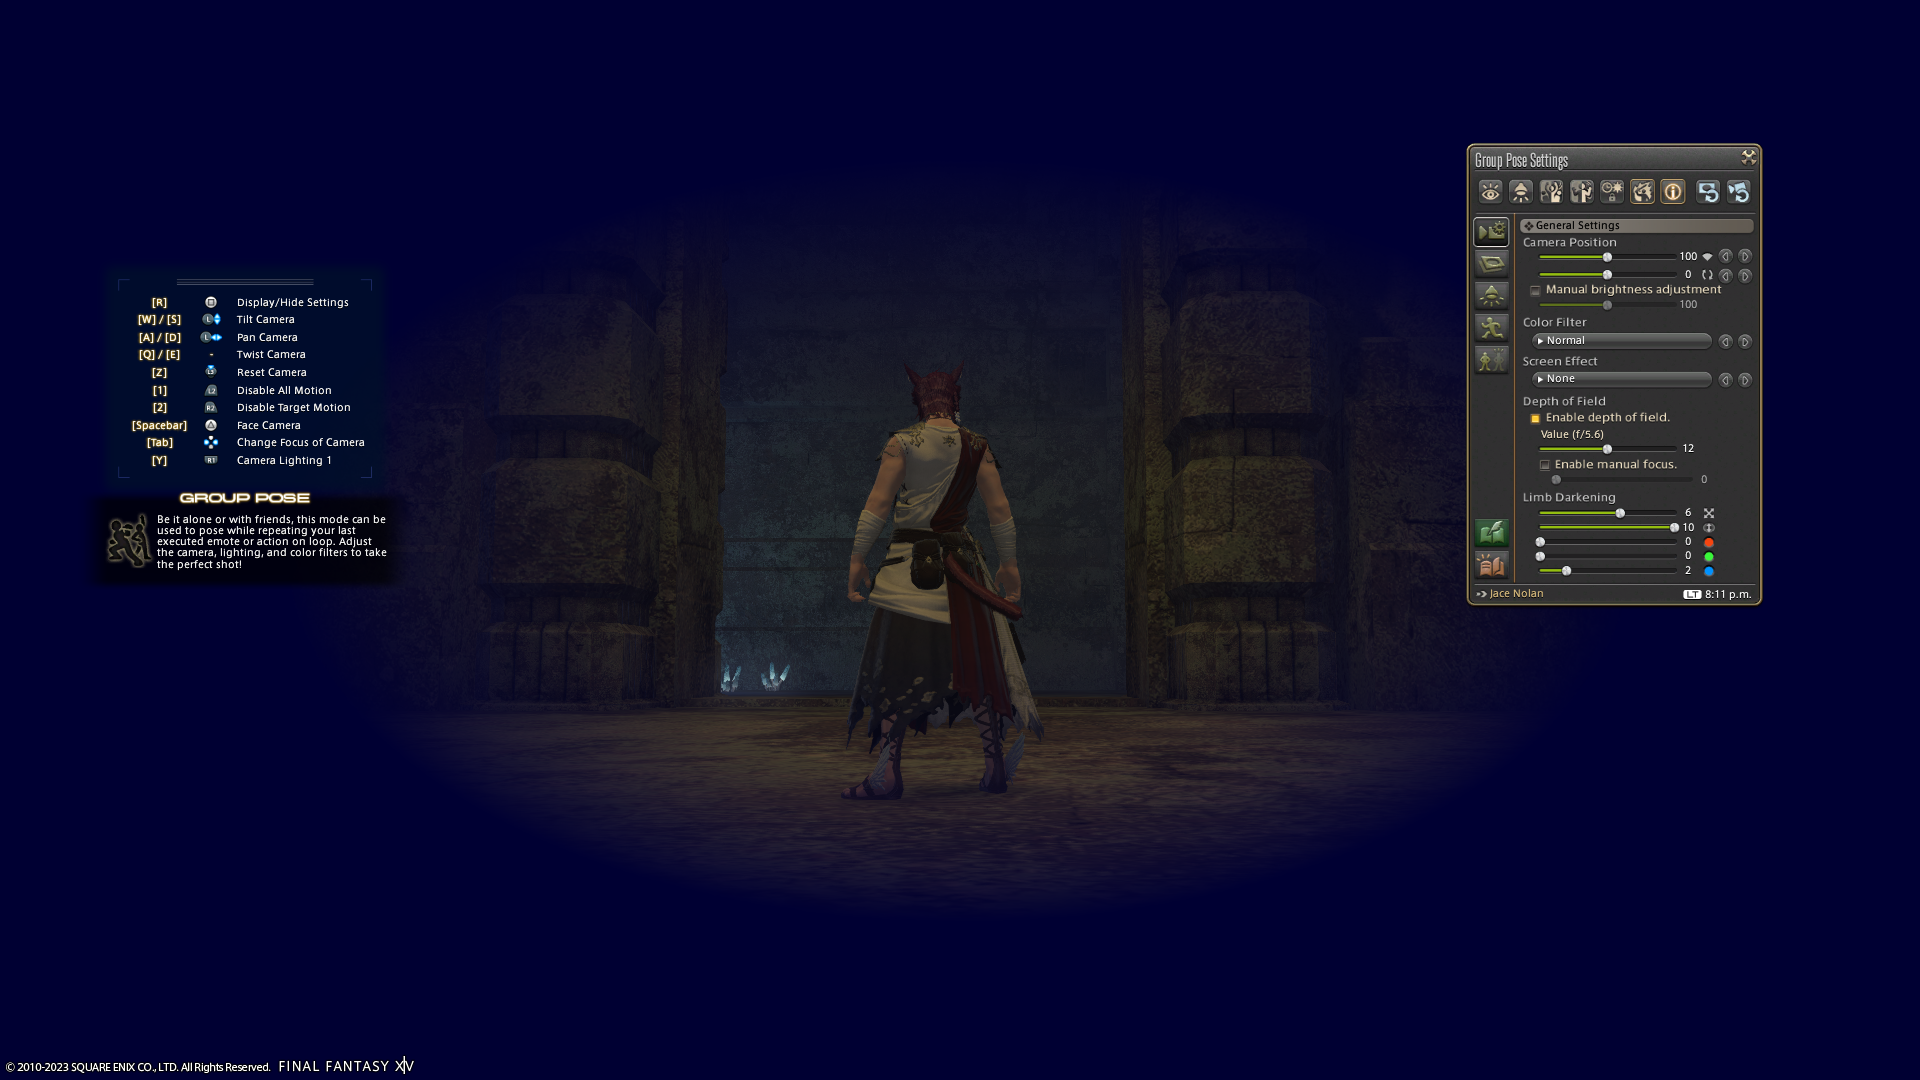
Opening Gpose will immediately hide your HUD and show the image on the left side. This is your Gpose Settings window. From here on, you can change a variety of settings to enhance your picture and help you along achieving the perfect screenshot. But what exactly do all these buttons? Why are there buttons on the top and on the left? Why do some open other windows? What is all this stuff?
Let’s start step by step, starting from top to bottom, left to right!

We start with the buttons on the top which will always be visible in the settings window.
The eye button decides if your character faces the camera during his motions or not. By default it is activated (visible by the golden frame around it).
The lamp button will activate extra lights. We will get to that one at a later step when we look at the lightning settings in more detail.
The two buttons after that have essentially the same function: They stop the movement of the visible characters. The first one, showing multiple people, will stop the movement for every player character on screen at the same time, no matter what they are currently doing. The second one, showing a single person, will stop the movement of the character currently targeted. This one comes handy when you have multiple people with different emotes and want to pause each one at a different time to show a specific movement.
The symbol with the clock, sun and lock will lock down the current weather and time. For example, if you want to make a picture during a sunset, this button will make sure, the sun won’t vanish and turn day into night while you are busy finding the right angle. It also ensures your weather stays at its current one, if you for example waited for that one dramatic rain shot, that just didn’t want to come earlier.
The icon with the fighting character will turn your battle effects on or off. This is helpful if you want a certain pose your character is making during a specific battle action, but the lightning effects around it are obscuring everything else.

The little i icon will toggle off the explanation for the different keybindings and what they are doing. It doesn’t have any influence on your picture itself, since you should hide all setting windows before taking your picture anyway.
The last two icons are for resetting your limb darkening and camera angle respectively. The limb darkening reset might not be as helpful, as you can easyily put the sliders in question all to 0 yourself. However resetting your camera angle can be helpful, when you tried to reach a specific angle and just can’t get it right, so you want to start again from a neutral perspective. Or your camera glitches out.
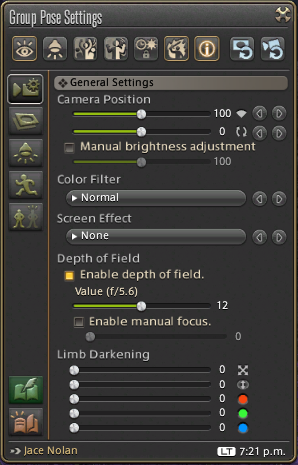
The next section to look at are the general settings. Working well with those can already mean a world of difference.
From top downwards we start with the camera settings, which consist of two sliders. The first one is your camera zoom. Moving the slider to the left (lower number) will zoom out. Sliding to the right (higher number) will zoom in. This slider works on top of your normal zoom settings. So for a real close up, you can first zoom in with your normal camera control and then zoom in even further with the slider.
The second slider is for the angle. Moving it to the left or right, will turn your view into a left or right angle respectively. The most you can turn in any direction will be 180°, meaning you can turn your picture upside down for some fun views.
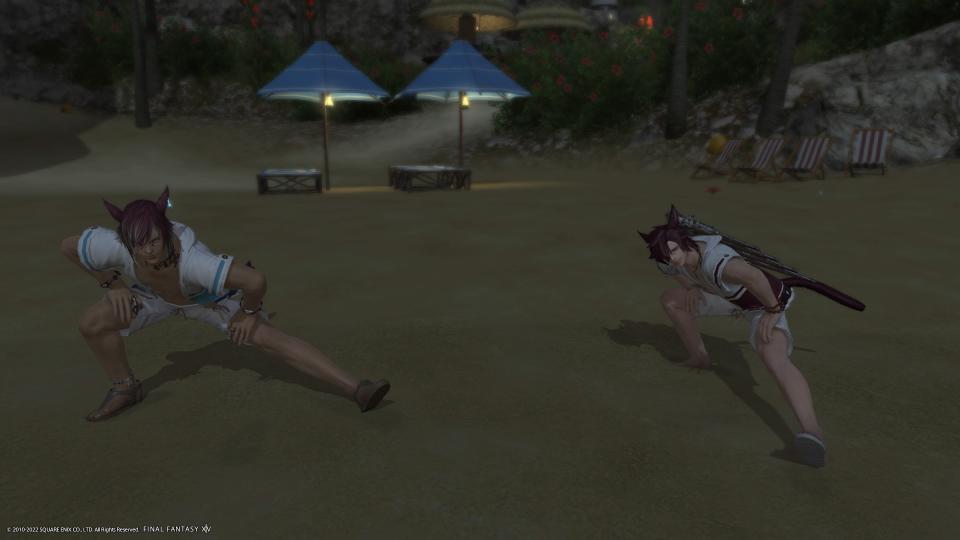
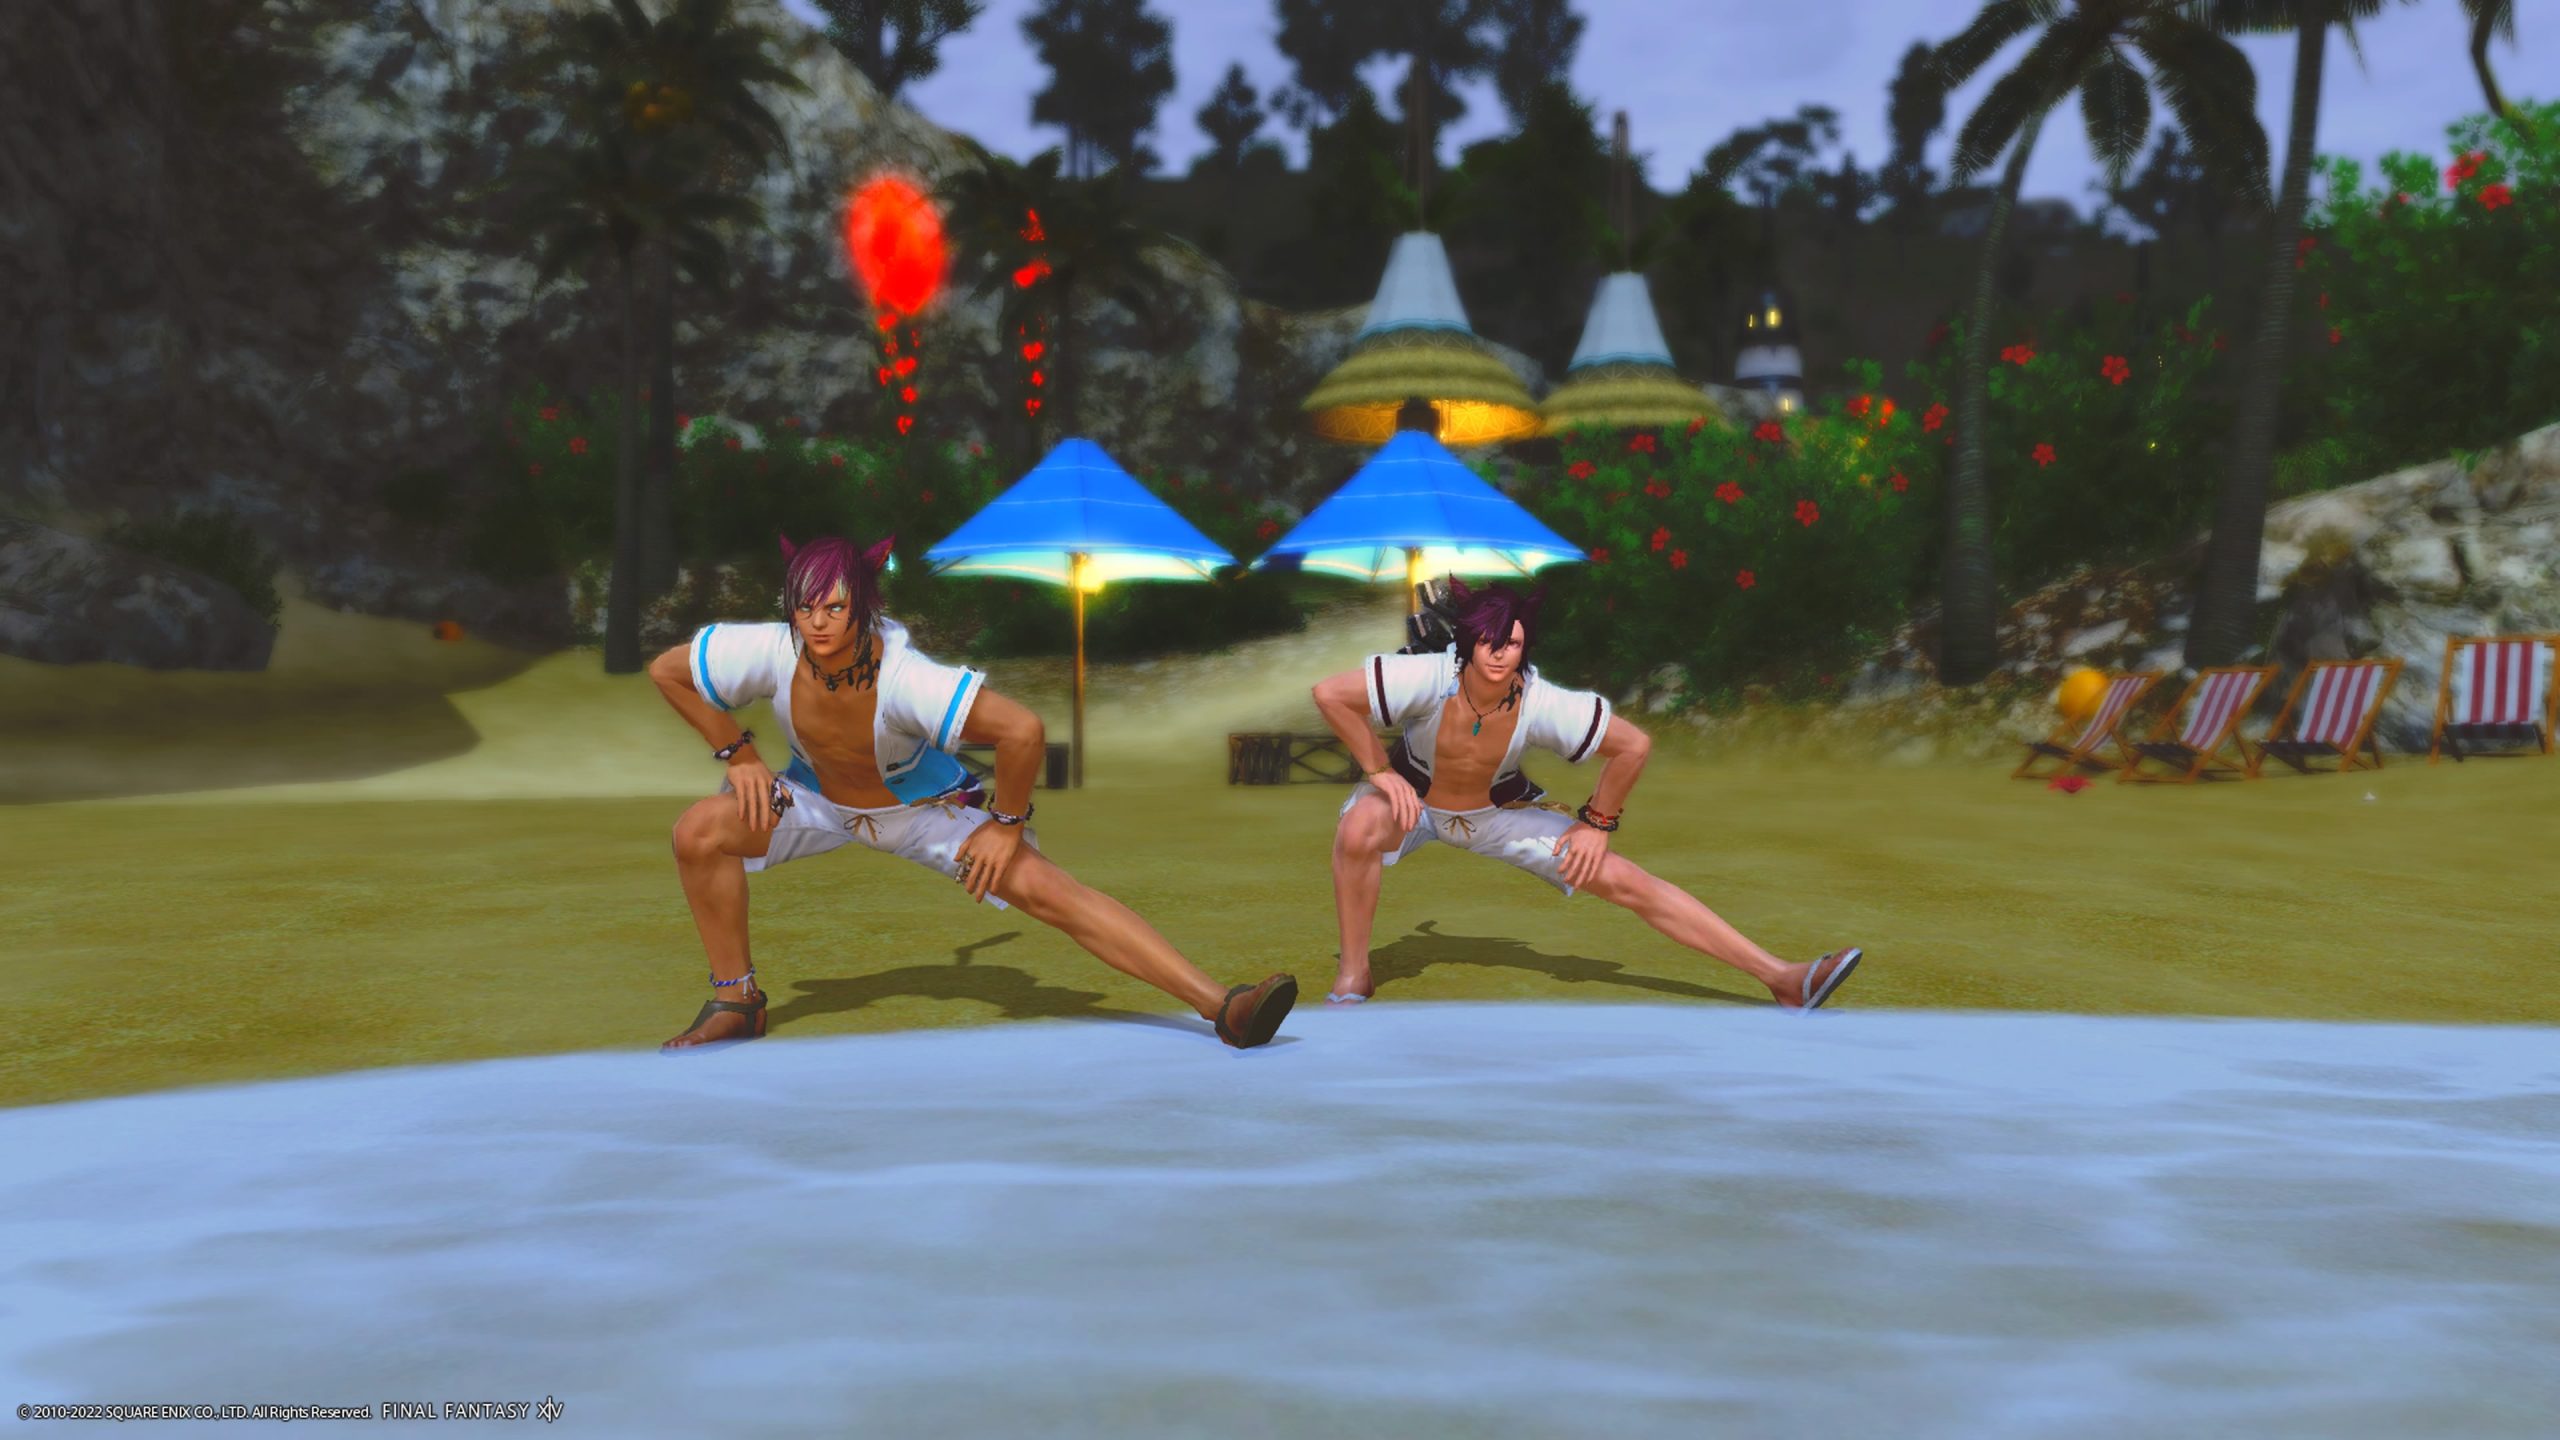
The next point is the Manual Brightness adjustment. Activating this will let you manipulate the overall brightness of the image. Lower number means darker picture, higher number means brighter picture. While this may reduce the general shadow castings in your picture, taking away depth from it, it can sometimes help giving an image a completely different feeling. Take the following two pictures for example. The same scene in rainy and nighttime Costa de Sol, taken by two different people. One used no settings, brightness or otherwise, at all, showing how the weather and time ingame truly was, while the other used “Face Camera” as well as adjusted manual brightness and a color filter to make it seem like it was daylight with less bad weather:
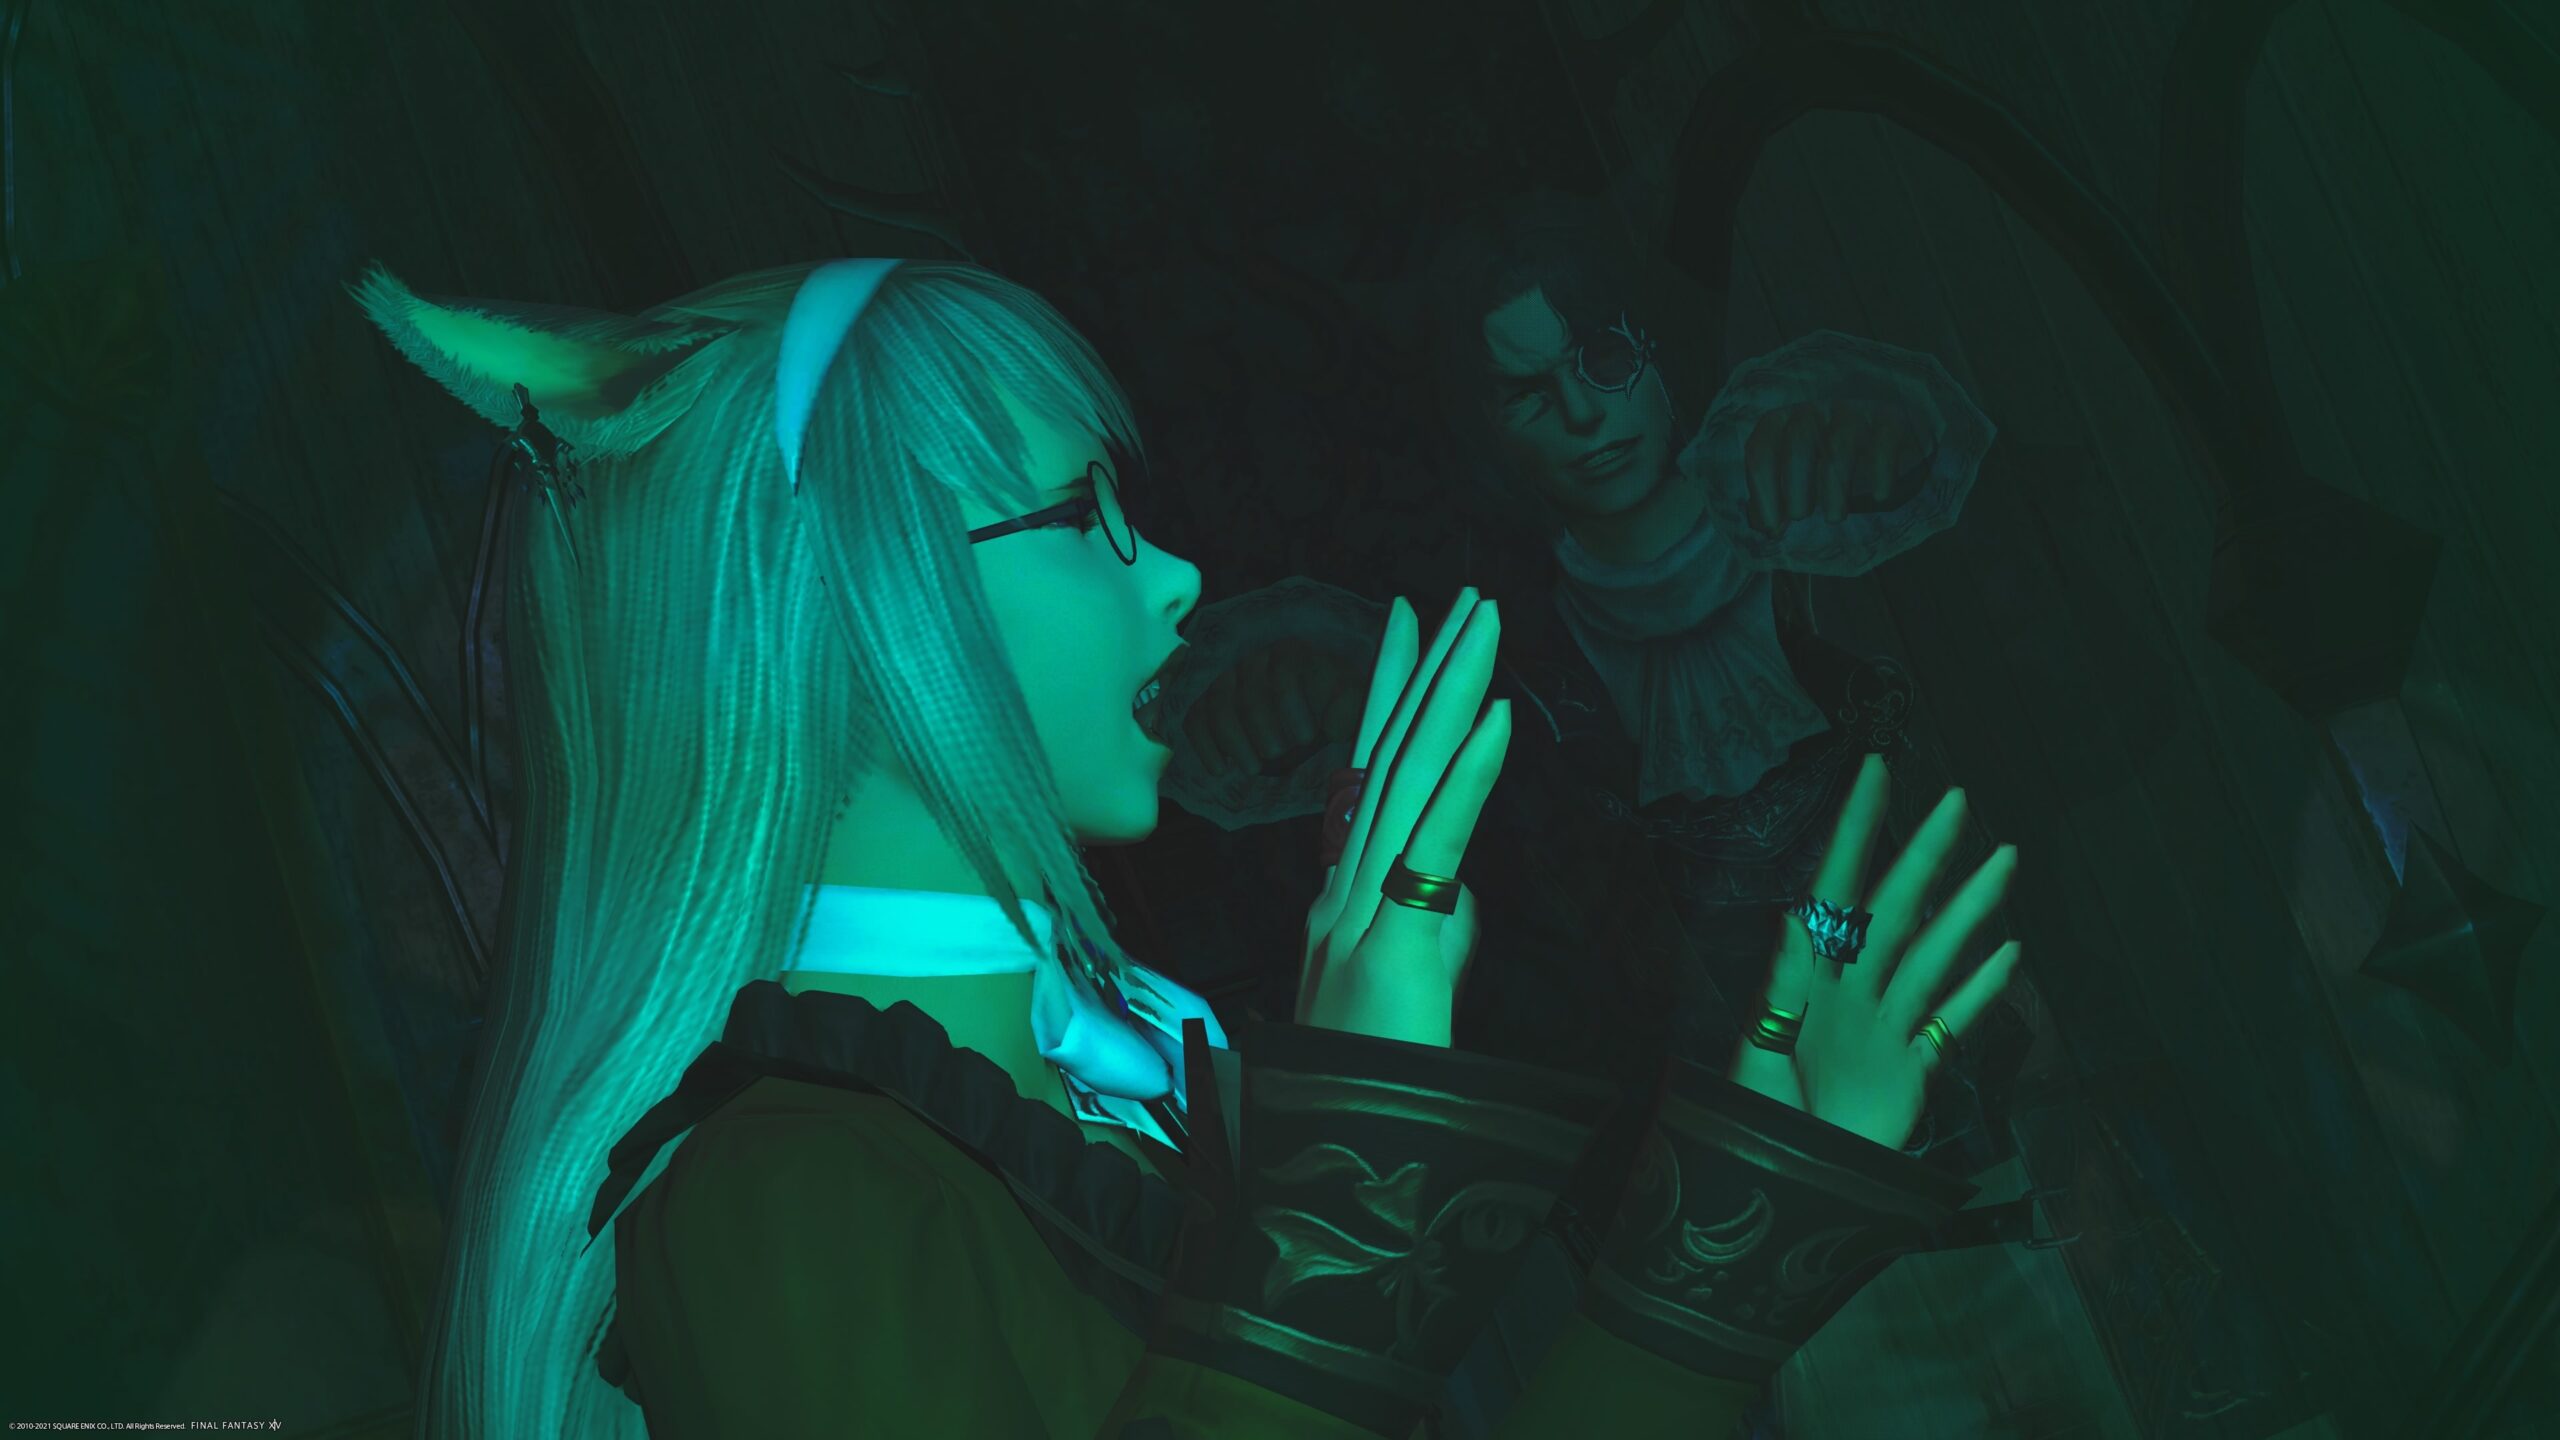
After the brightness adjustment we have two drop down menus. The first one is for a color filter. Here you can chose different filters to cover your whole image in an effect, like sepia, monochrome or enhancing colors by using different bright filters. One example of such filter use can be seen in the above example with the brightness, as the left image also used the color filter “Bright 4”. Filters can be used in a variety of ways, either to give a better view of everything or to help across with different emotions.
Some great examples from our 6th screenshot contest using the filters monochrome (left) and monotone (right).
The second drop down is for different effects you can lay over your image, such as motion lines, flower petals, or pencil drawing lines.
After that comes the Depth of Field setting. By default it is enabled, which means, things that are further in the background will be blurried, giving more focus to whatever is in the foreground. You can decide how strong the blurriness is by changing the value slider. Enabling manual focus will give you even more control about the focus, by moving the focus either into the foreground (blurring out everything in the back) or into the background (blurring out everything in the front).
Attention: If these sliders don’t do anything for you, you might have deactivated “depth of field” in general. To activate it, you have to leave gpose and go to System Configuration > Graphic Settings > scroll all the way down and check “Enable depth of field” under “Cinematic Cutscenes”.
The last section in the general sections is all about limb darkening. Surprisingly, limb darkening has nothing to do with limbs but with the “frame” of your image. It basically lets you darken out the otusides of your image while deciding on how big said darkening will be, in which form or what color in exactly that order from top to down. Below is an example. I chose a rather big area of darkening by setting the area of effect to a 6. Instead of a circle left of my picture, I used the second slider all the way to max to make it an eclipse. And since pure black was boring, I went with a hint of blue. Combining the different colors will give you mixtures of said colors, for example using both the red and blue slider will give you a purple darkening. And as mentioned earlier in this guide, if you don’t want to push all sliders down to 0 individually, we have the “reset limb darkening” button at the top button bar.
Clicking on the second button on the left will get you to the effect and framing settings. This is usually the last step for me but for this guide I will go through the options as they are presented in the game.
The first option is a drop down menu called “status”. This lets you put different status effects such as freeze, petrification or seduced on your character. The usage of those are rather niche, mostly if you have multiple actors to tell a story within a picture, so they might be rarely used but it’s always nice to have more options, right? Just don’t forget to press the play button after selecting a target and status or else it won’t show.
The second option is a simple enable/disable via the play buttons: Wet Attire. This will give your character the status wet, making clothing, skin and hair darker, but also a little bit shinier. This can be used for shots around water (duh!) but it can also be a helpful trick in certain areas that are especially bright by default, darkening your character model without taking away depth from it.
Frames are, well, ways to frame your picture, such as classic polaroid picture frames or black borders like in cinematic trailers. There are a lot of ways to get creative with those to give your picture different formats from the get-go.
The last option is a big yellow button called Sticker Mode. This will open a completely new window with a ton of stickers you can add to your picture. The variations go from little monsters to text, icons, emotes and so much more. Once you have placed a sticker, you can change its size or rotate it to different angles, giving you a lot of creative freedom in how to use them.

The next button on the left (the lamp) will get us the lighting settings. To get any of those settings working to begin with, we will have to also enable the lamp button on the top of the settings window. After that we can work with up to three different lights, all with 3 different types and 3 color sliders. Looks confusing? It really isn’t.
In general there is no difference between lighting 1, 2 or 3. Rather, you can see it as the option to have up to three different lightings for use, each individually configurable. The type defines how big the light is, with 1 being the smallest light and 3 being the biggest light.
To position a light, place your camera in the angle and distance from where you want to have your light shine upon the scene. Then activate one of the numbered lamp icons and it will place a light exactly where your point of view is. Do this for as many of the three lights you want to use. You can then move back to the camera angle from which you actually want to take your picture and work on the settings such as which brightness type and which color to use.
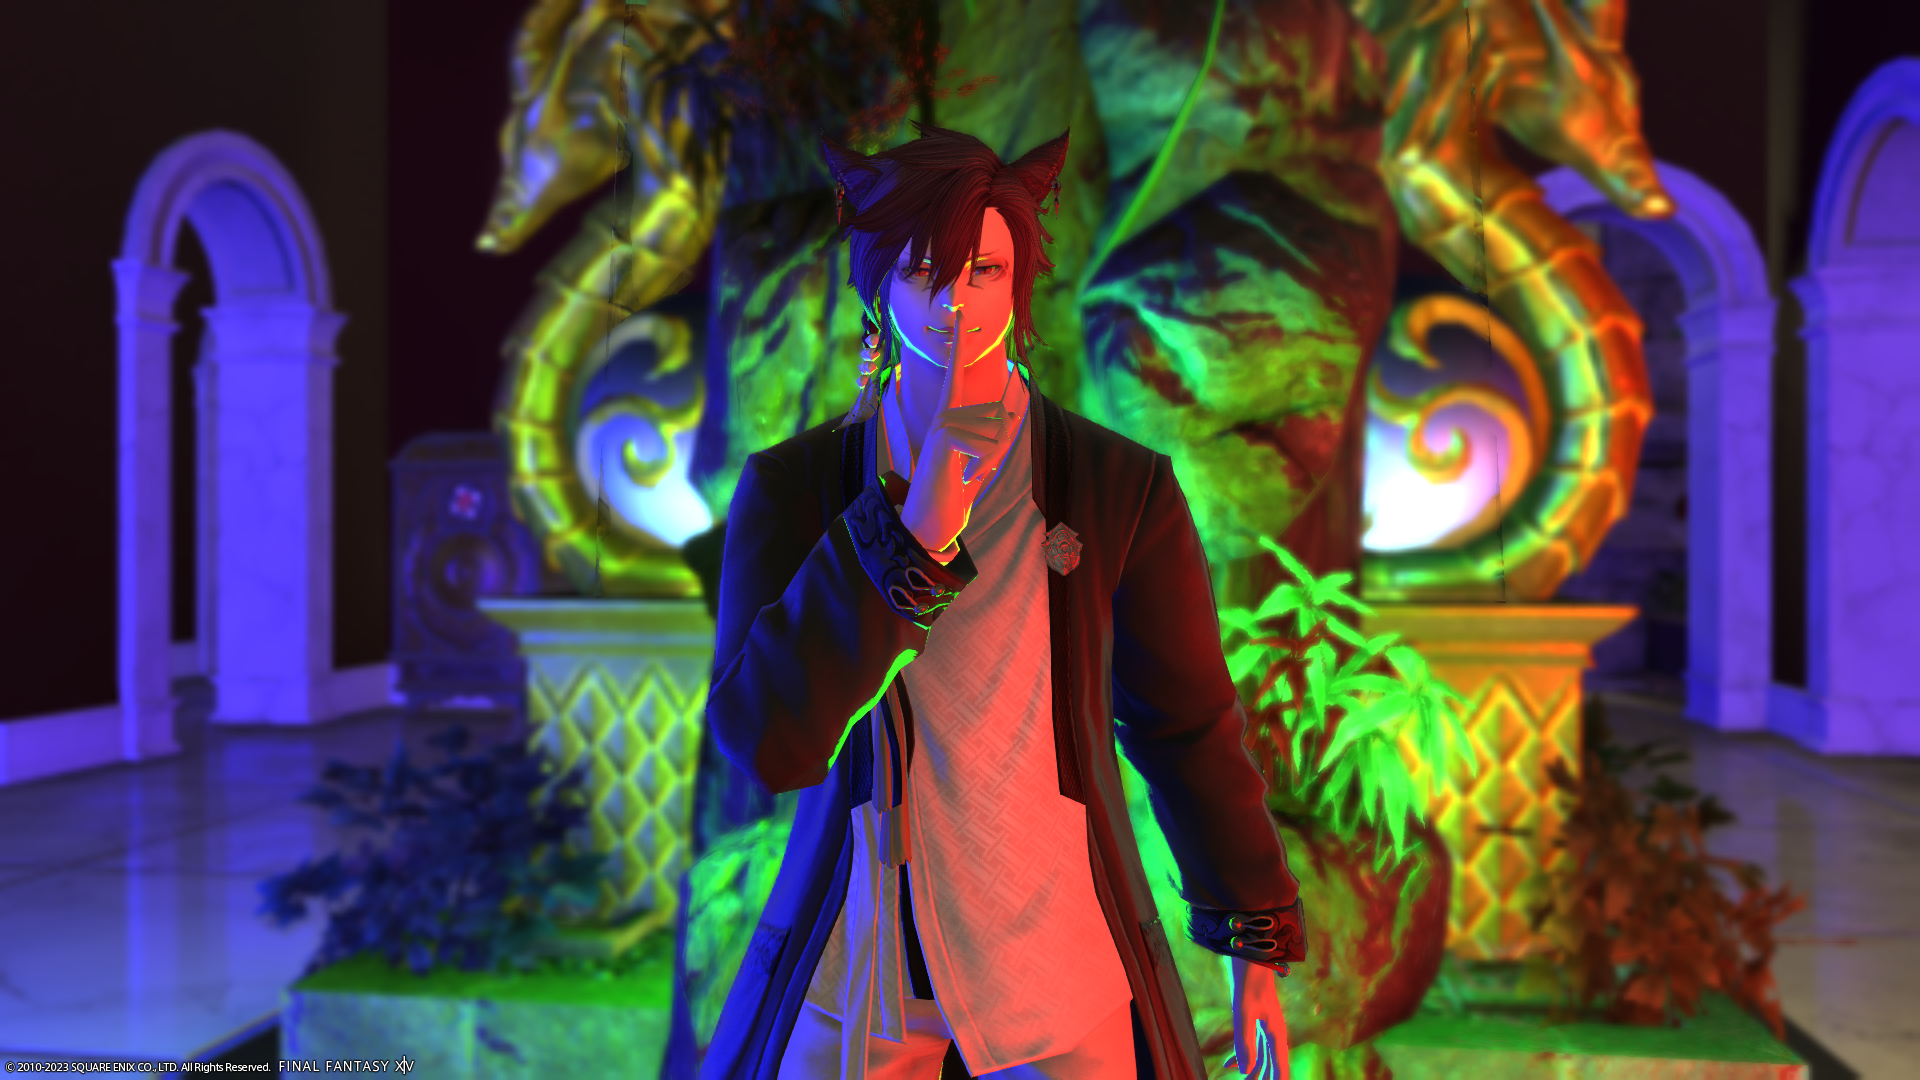
The above picture shows all three lightings used at the same time. The first one, I used as smallest brightness, and placed it right behind my character by zooming in all the way on his back. As example color I made it green.
The second and third light I put a bit away from my character to each side on the floor. One being red, one being blue, both of stronger brightness types. As you can see it colors the sides of my character in red or blue respecitvely.
The last option on the lighting settings is Character Lightning. This is a slider that will brighten up all player characters and just the player characters. While it helps making your character more noticable, especially in dark scenes, be aware that it will also reduce shadows shown on your character and therefore takes away depth from your character model to some degree.
Coming to the next button on the left, we have reached the motion settings. These settings help you get your character into the right pose.
Starting with the two eye buttons, the first one is the same as the eye button on the top bar, making your character face the camera or not. The second eye button will allow your character to follow the camera with just his eyes, meaning he will glance to the left or right if you move the camera to the left or right. The arrow button to the right will let your character repeat his current action infinitely. Disabling it will make your character stop and do nothing after finishing his emote or action.
Next is the Movement drop down. Here you can chose between different walking speeds and directions. Pressing the play button will move your character, pressing the pause button will make it stop.
In a similar fashion also work the Lip movements, letting your character speak in different speeds. The higher the speed, the more the rest of the body, especially the head will move with the lips.
Underneath those drop downs we have the emotes. Clicking on the emote icon opens your emote window. From here you can choose most emotes applicable to your location to use instead of the last used action before opening gpose. Not all emotes can be used, for example Change Pose and Sit are both unavailable within gpose. But most emotes can be executed. Pressing the arrow circle next to the emote button on the gpose settings will stop whatever emote you used within gpose and instead make your character repeat the last action outside of gpose again.
Pro tip: most emotes can be combined with expressions and even with lip movement. So nothing stops you from smugly getting ready for a fight while also telling your opponent about it!
The last of the upper left buttons on your gpose setting will bring you to the Character Display Settings. As the title already says, it will let you chose what figures will be visible in your image or not. That means you can quickly blend out any npcs, minions, pets, other player characters or enemies with the click of a button. The drop down menu at the top will give you some predefined filters for faster options but everything the drop down gives, can also be achieved by just diasbling the options yourself.
While I said the last of the upper left buttons… there are two more options that work in tandem with each other that I have yet to explain. Those two are the book buttons in the lower left corner of your gpose settings.
The green book is the Save Settings window. Here you can save the current settings for your camera position and your lighting settings. With the Save Preferences you can decide if said settings should be saved relative to your character position or relative to your camera (point of view) position.
Respectively, the orange book will load your saved camera or lighting settings. Be aware though, that you can only save your latest settings. So if you move your camera and save it again, the next time you will click load it will load those last moved camera settings.
Why even bother saving then if you can’t have multiple loadouts? Simple. This is a time saver when you already set up your whole image, character, lighting, camera, everything… only to notice that a tiny piece of jewelry is visible that destroys your whole glam look! Or you forgot to lock the weather in and suddenly it is raining and you need to wait another who knows how many Eorzean hours for the next sunshine! There are many reasons why you suddenly need to leave gpose and restart your image, and to not do so from scratch, never getting that one angle right again… that’s what this save/load setting is for!
So much text and surprisingly not as many pictures in a guide about how to make pictures… Shame on me! I might update this in the future with more examples for all the settings. But for now, I thank you, dear reader, for getting through this guide and I do hope I was able to give you a little bit of help to get into the depths of gpose and screenshots in ffxiv.
And if you are a member of SDS, I hope I get to see your entry in our next screenshot contest then 😉
Have fun taking pictures!
